Our Build Process
Building a home from the ground up is a HUGE undertaking and investment. Not just because it takes an emotional and financial toll, but because it’s a hard and often overwhelming process that you want to make sure is done right…the first time! We are in the process of working on our fifth new build and we have learned many things along the way. Though our design process fundamentally hasn’t really evolved, (why fix something if it ain’t broke) there are definitely things that have been adjusted to make the whole experience as smooth as possible, not just for us, but for our clients too! There is inevitably stress involved when taking on a new build - but we think that if you have the right team in place, it can also (and should) be fun!

Our process may not be ground breaking, but it always puts our client’s vision first. To explain how we do what we do, we thought we would take a look at our Bower project. This home was our second new build, so let’s dive into the design process of how this house came to be!
Before we get into it, here is our pre-project advice to kick off any project of any scale:
Find The Dream Team
Interview. We can’t stress this enough. Remember that you are hiring the team that best suits you. Experience and portfolios are great, but if you don’t jive with the designers/builders then you are setting up for failure before you even begin. Your team should include at least a designer and a builder. The rest of the team can be built by those two groups!
Here are at least 5 questions you should ask when interviewing:
What is your process like when working with a designer/builder?
How do you make sure your estimates/budgets are accurate?
Who will I be working with on your team?
How do you deal with project delays?
Can you provide me with a few references?
Establish A Timeline
The whole process always takes longer than you expect, since there are so many steps along the way that involve multiple people. You should be asking the teams you talk to to provide you with a timeline. If they say it can be done in less than a year… really look into their proposed process. You will want to use this timeline as a reference point to keep the project on track, as it will likely fall behind a time or two!
Commit To A Team Before You Hit Go
Making sure you have your designer and builder confirmed and committed is crucial. Throwing someone into the mix part way through, thinking they can just catch up and fit in seamlessly, isn’t realistic. It will save you time and money in the end to have all your ducks in a row before deciding to proceed.
Our Process:
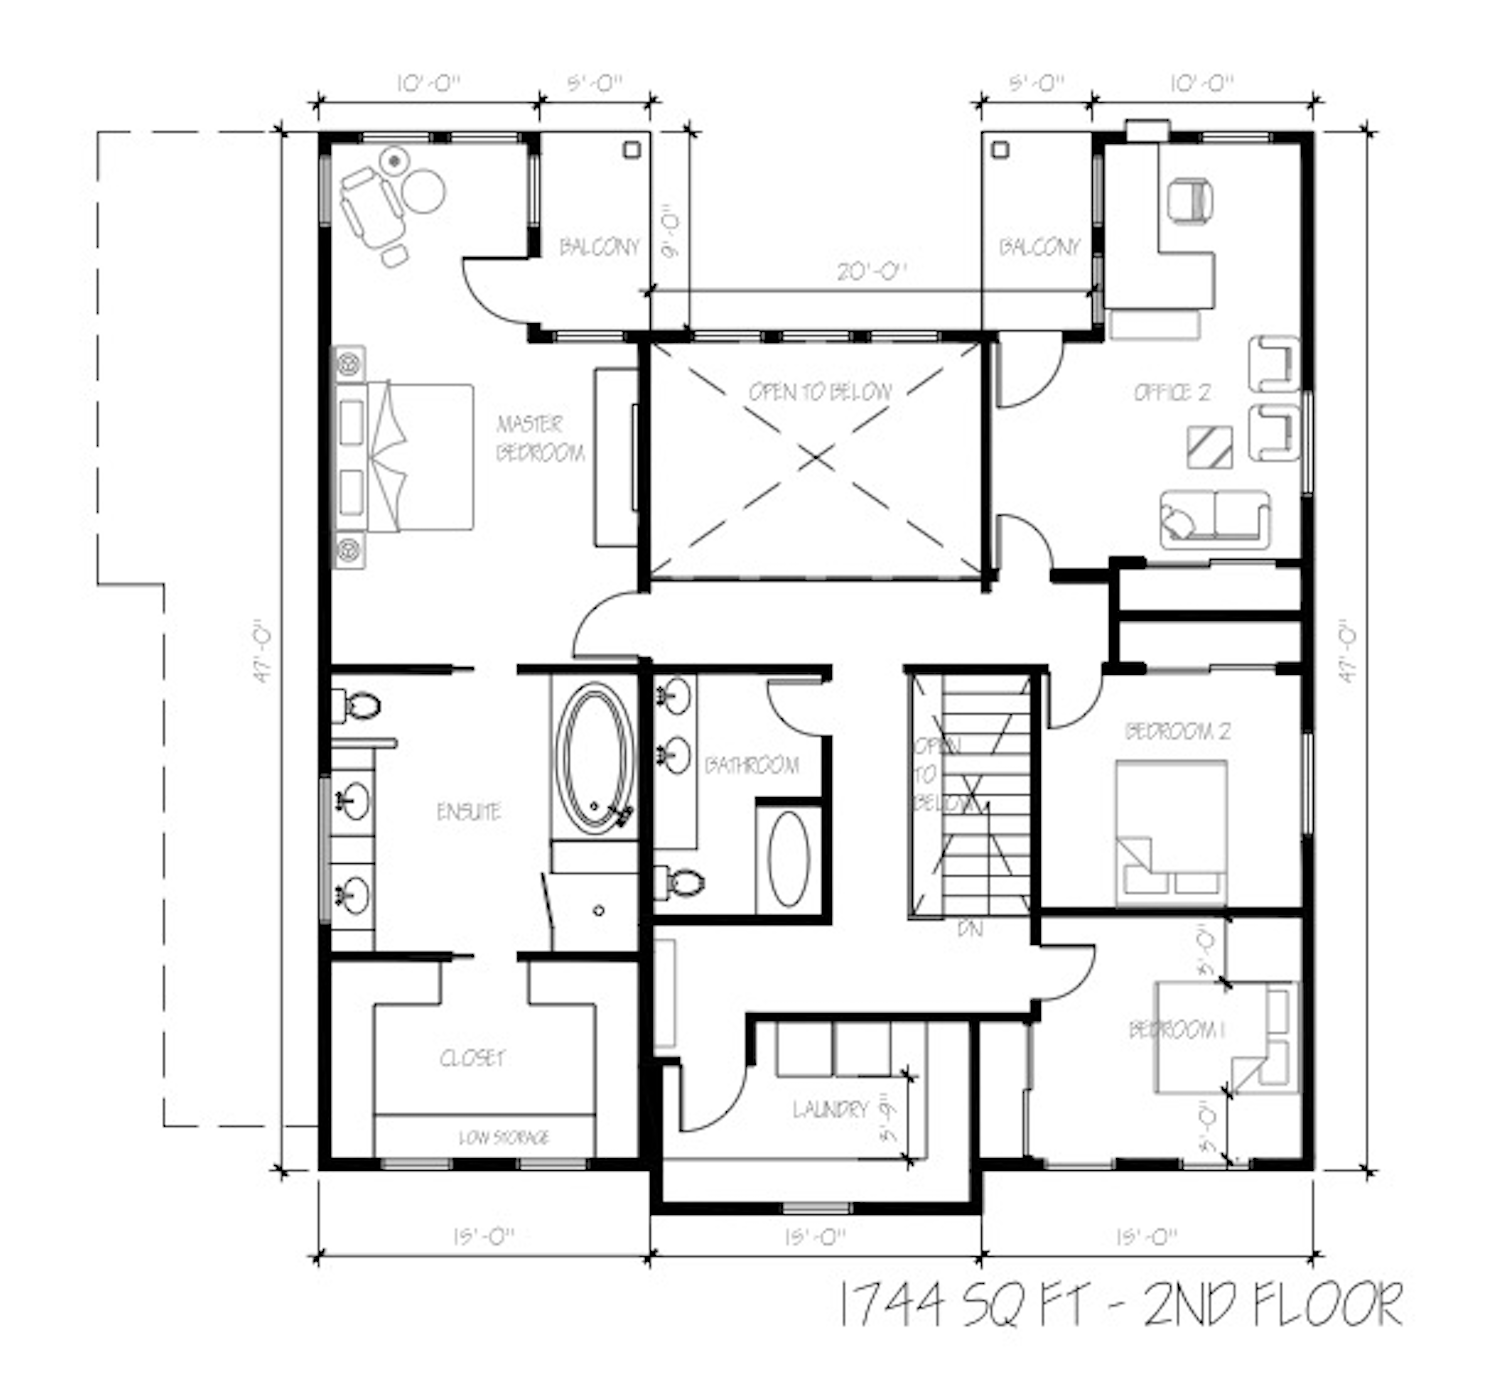
So let’s say you’ve signed on to work with us - what’s next? Let’s take you through how this beautiful house design evolved and came together to explain how our process works! For a reference point, this was a 2 year process from the start of design to the finished build! We think it’s critical to have realistic expectations of the length of time you should plan for!

You’re going to want to get yourself a site survey and geotechnical report off the hop. These are things that the builder will be able to guide you on, but they are all part of the process and take time. These are going to come in to play when it’s time to submit a building permit and are also needed when we are developing the site plan.
What you see here is NOT a formal site plan, but it’s where we began with Bower so we could keep the process moving. This is where we marked the setbacks and it allowed us to determine where the house could go and it’s max foot print.
Then we got to work putting together a couple of concept plans based on a check list of spaces we had discussed with the clients. Any specific needs or adjacencies were worked into the plans along with some conceptual images to help communicate the design intent.
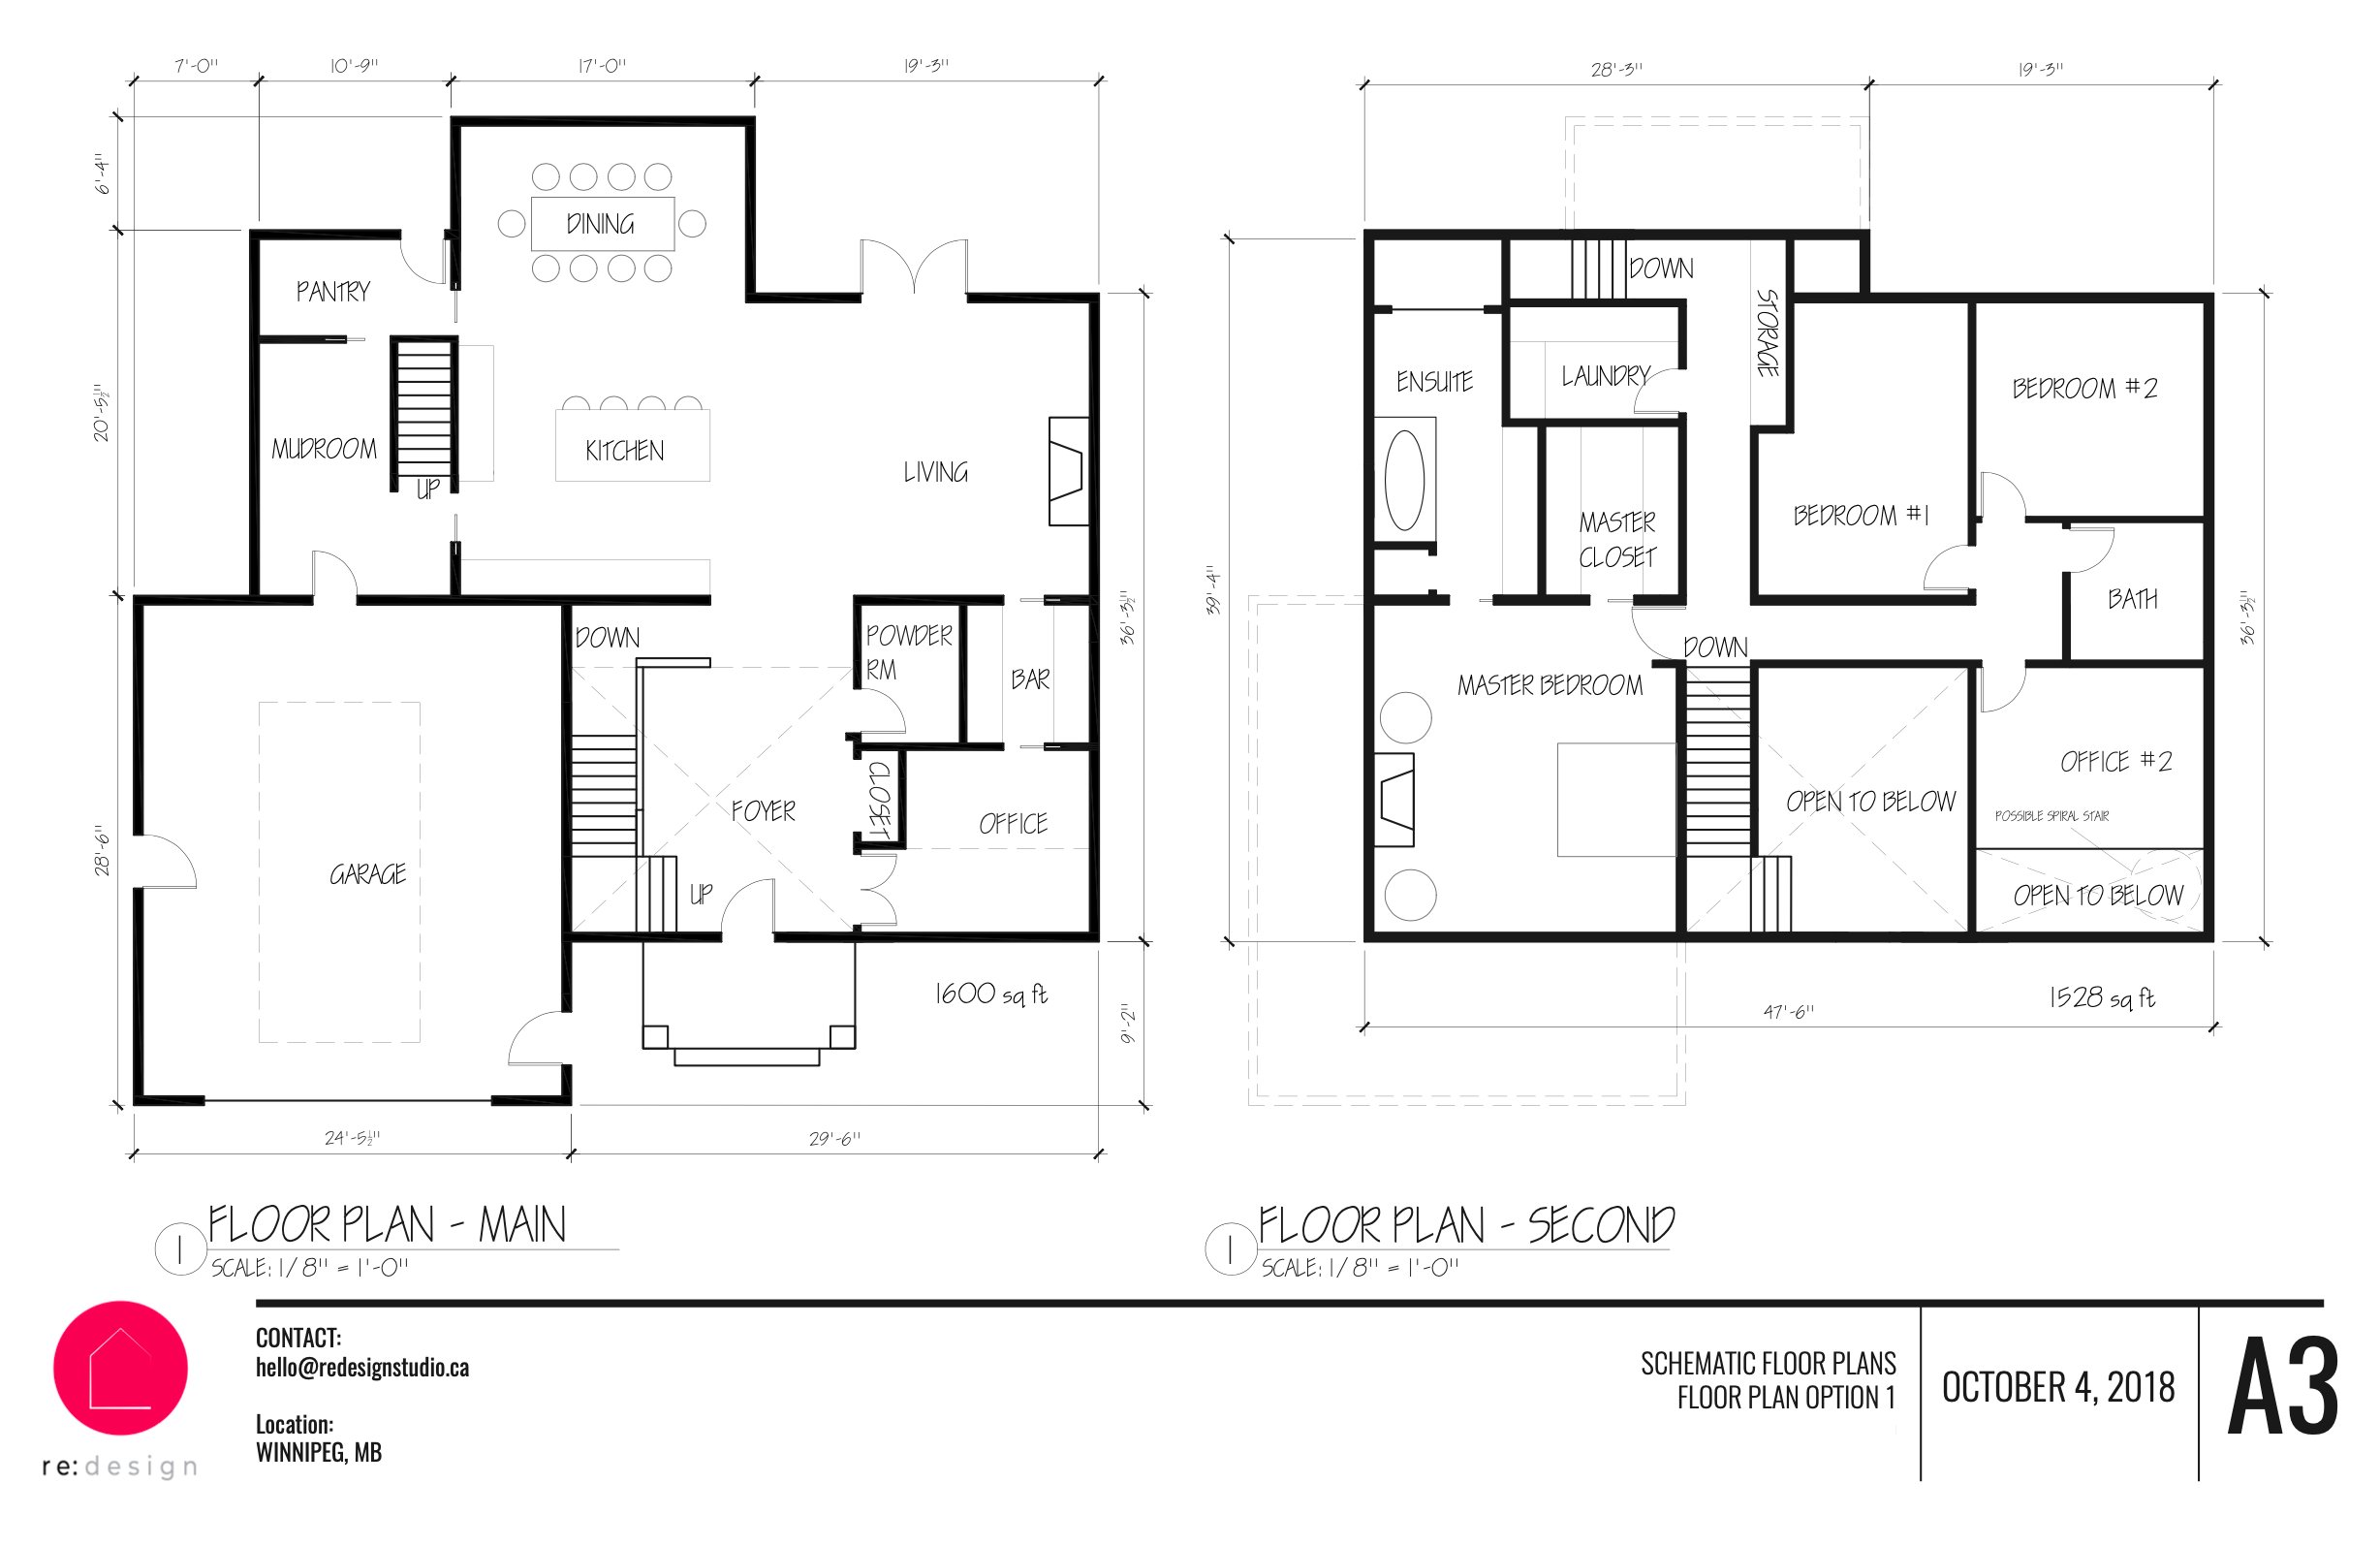
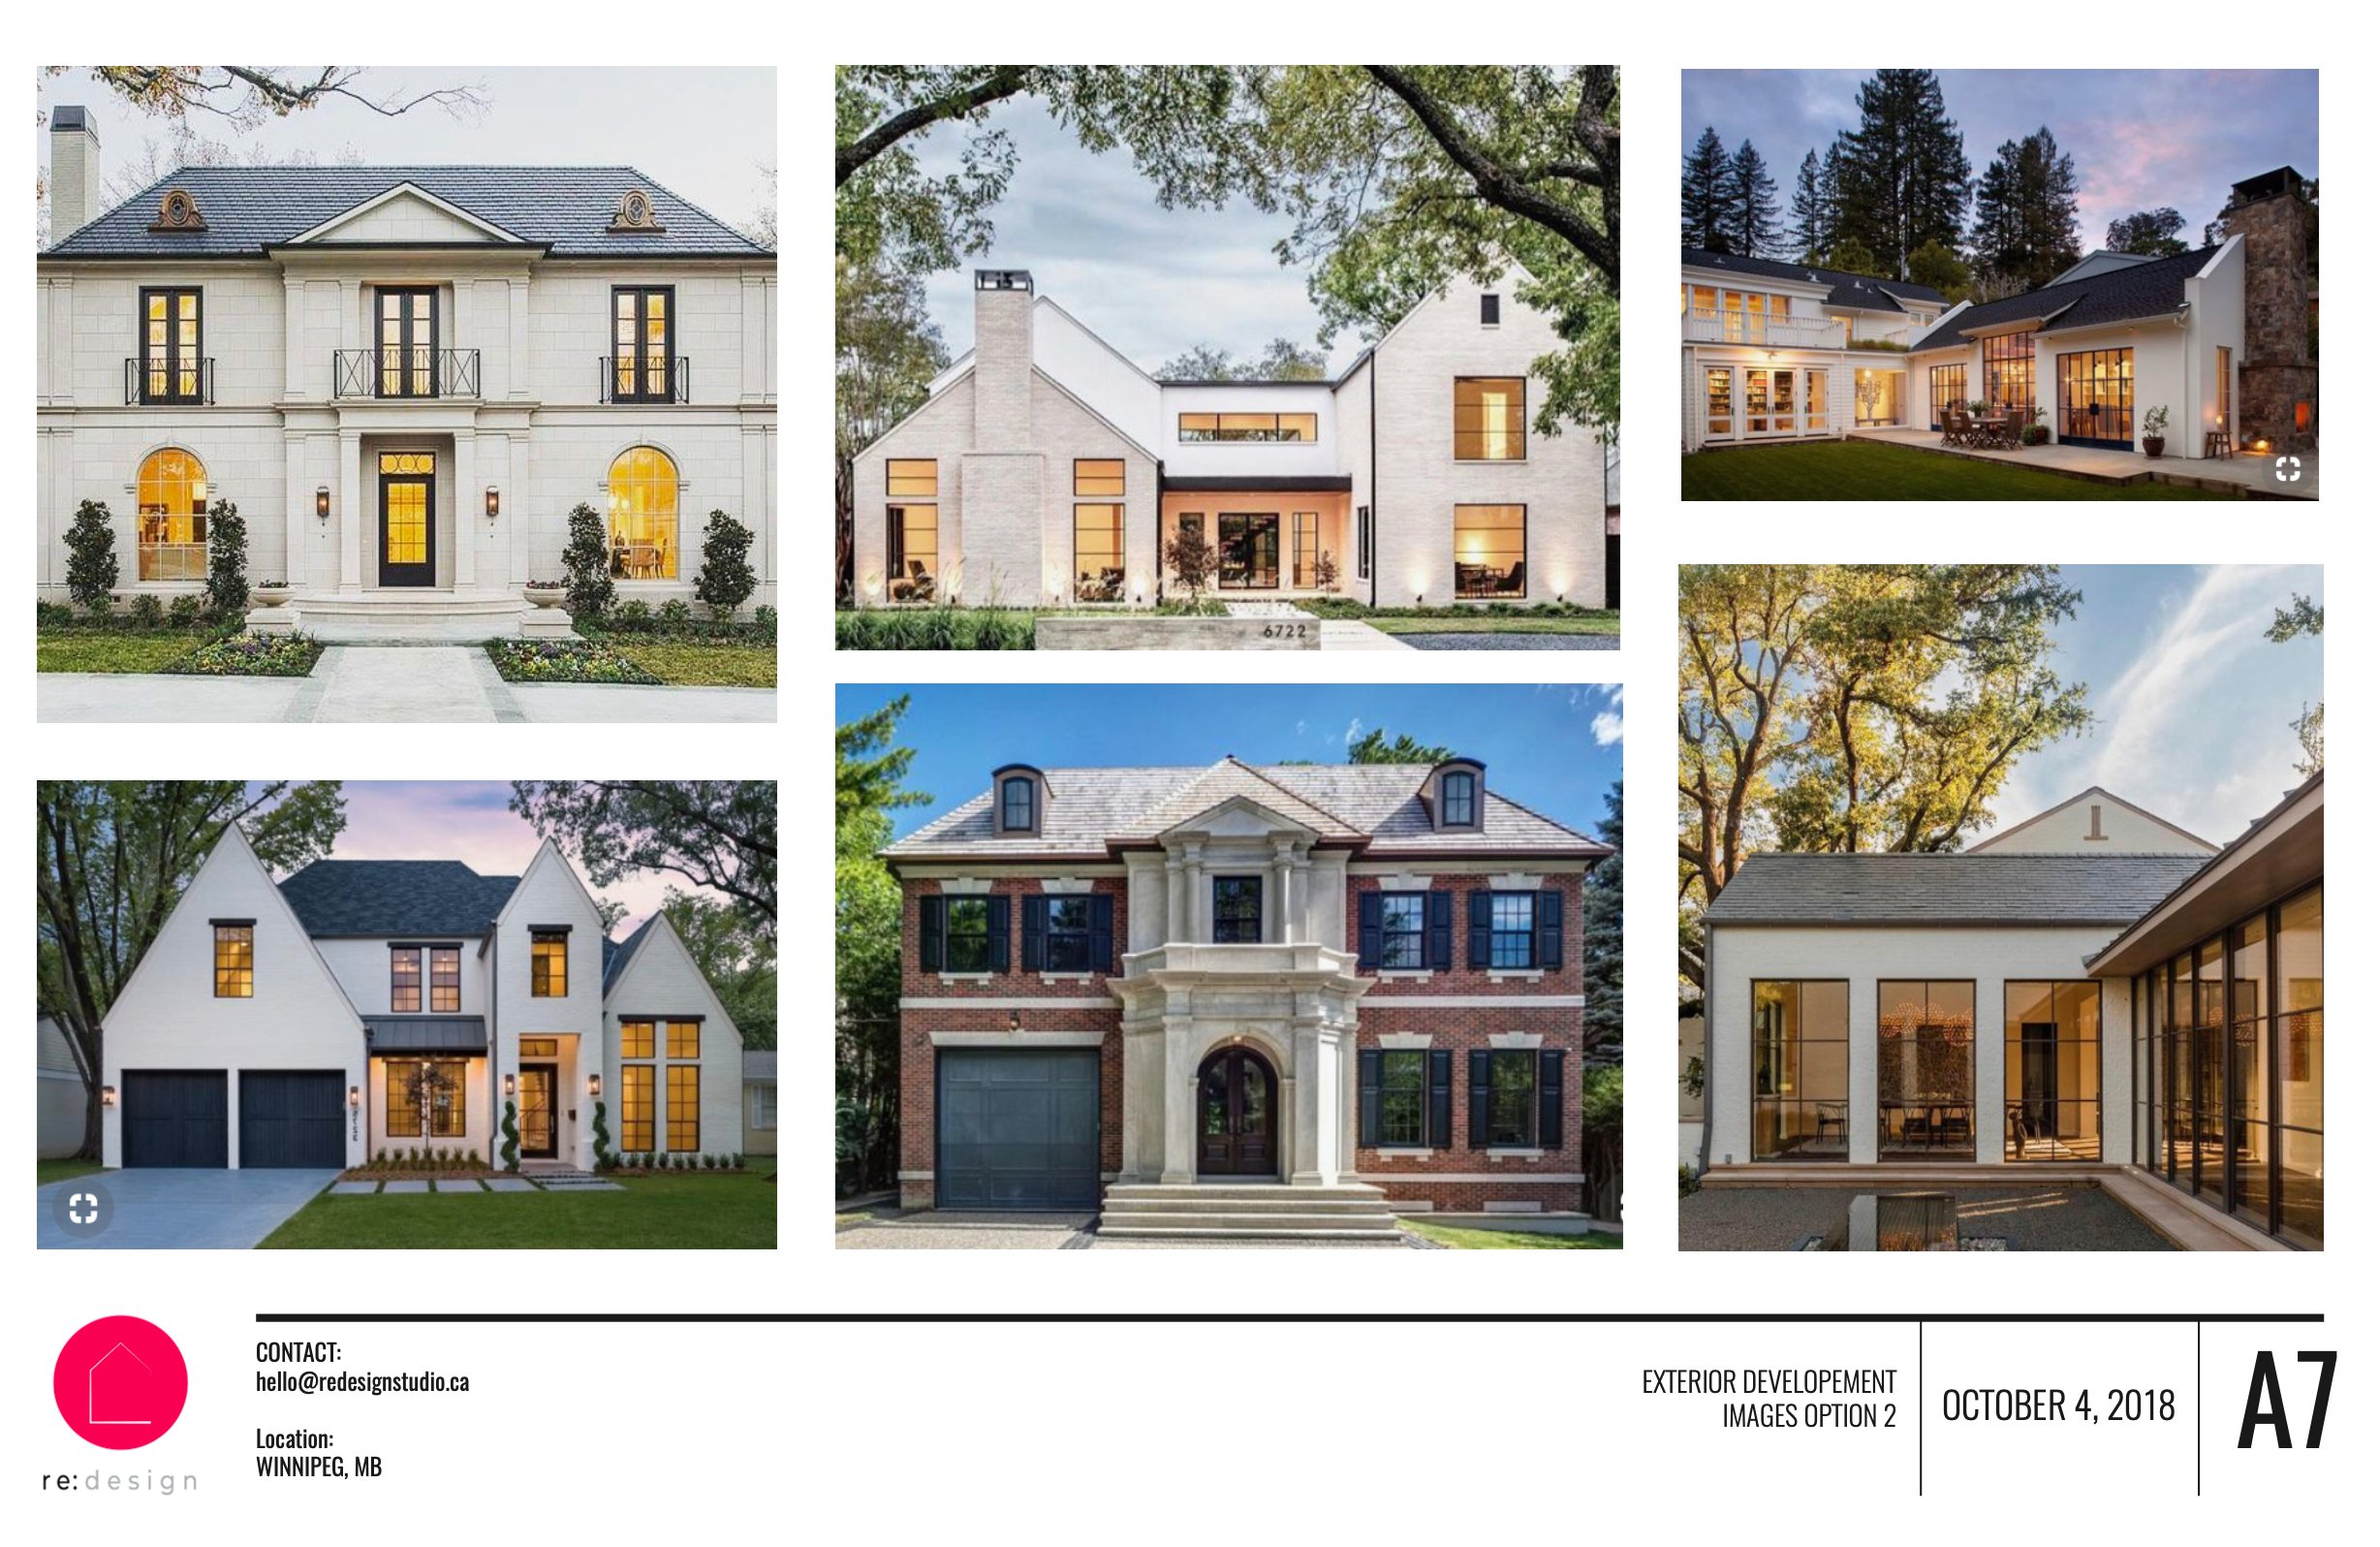
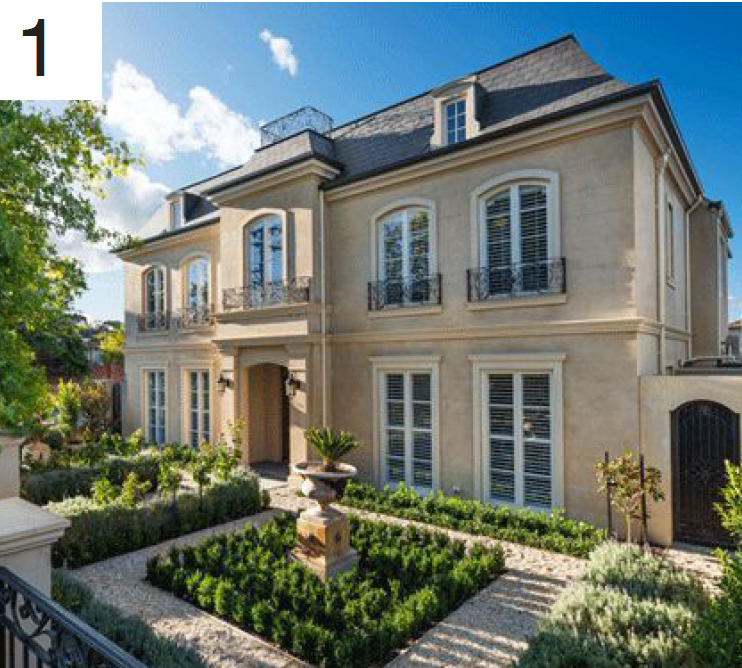
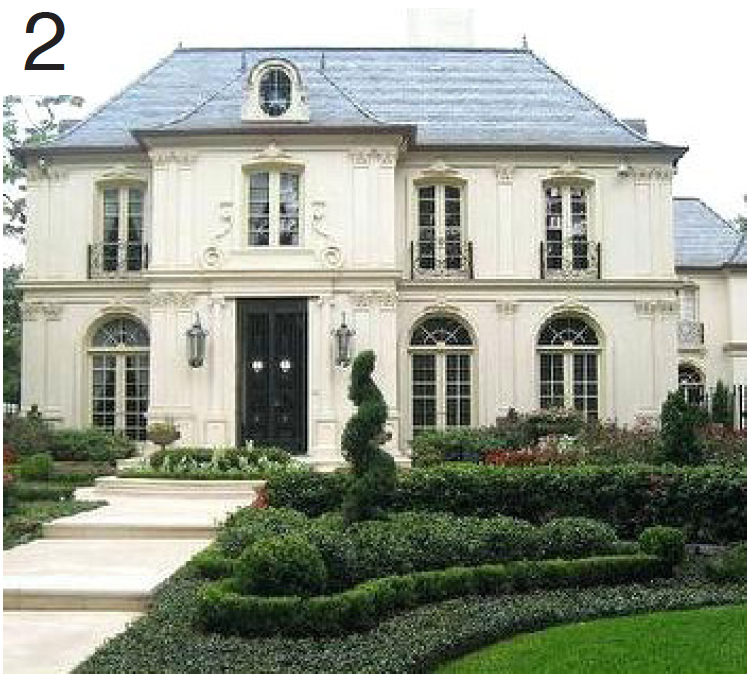
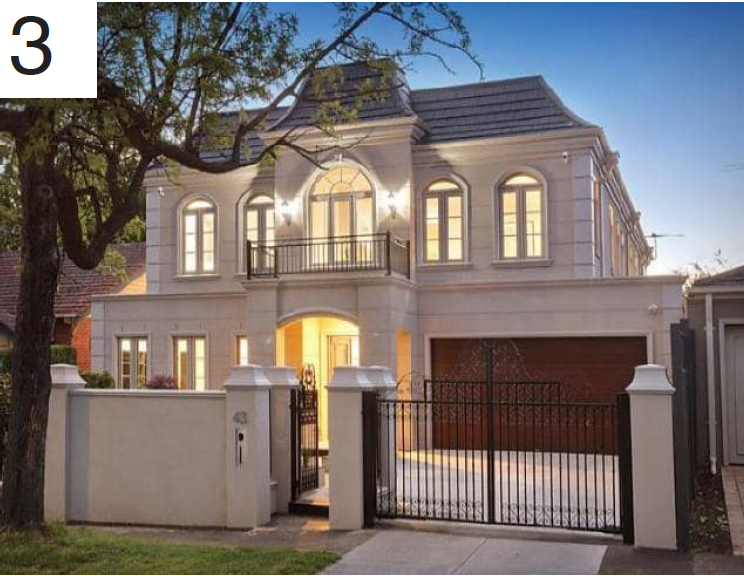
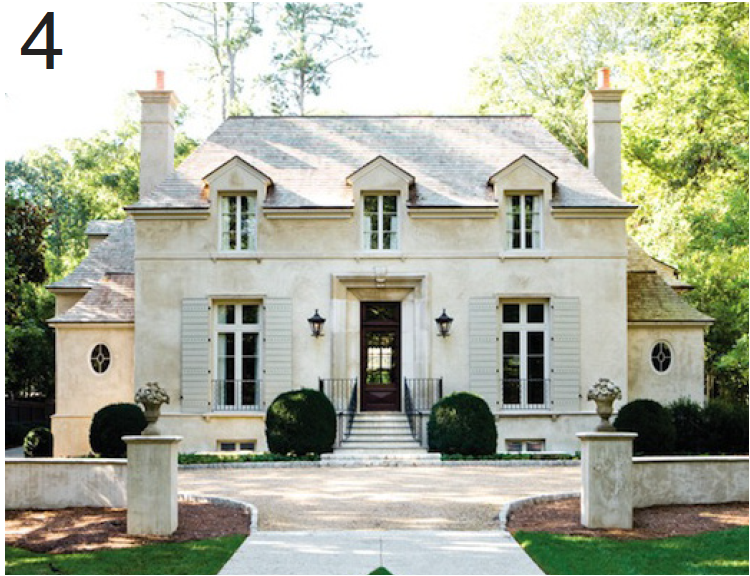
From here, we worked with the clients to really get down to what they prioritized in the space planning. We dove into what worked and what didn’t about the first rendition of plans. What dictated the overall design was three main goals for the exterior:
Symmetry
Wings in the rear of the home
Large curtain wall windows
Garage flush with facade of house
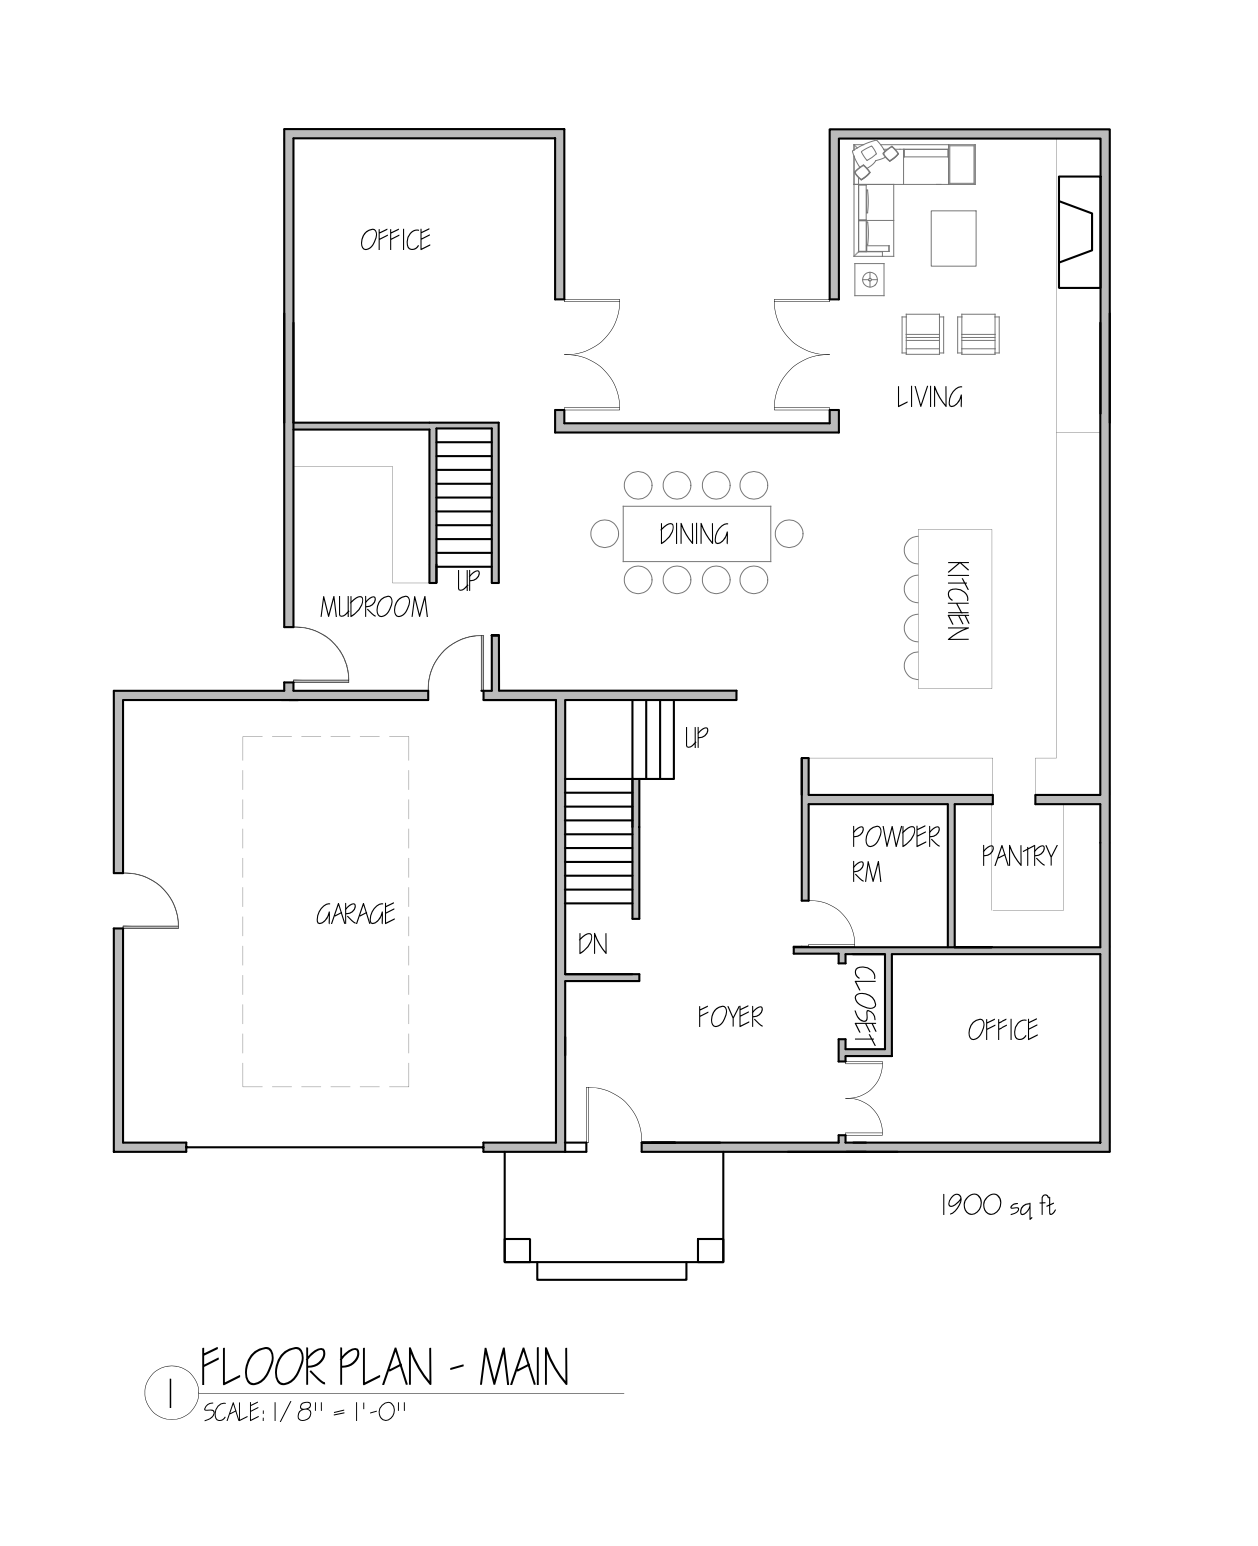
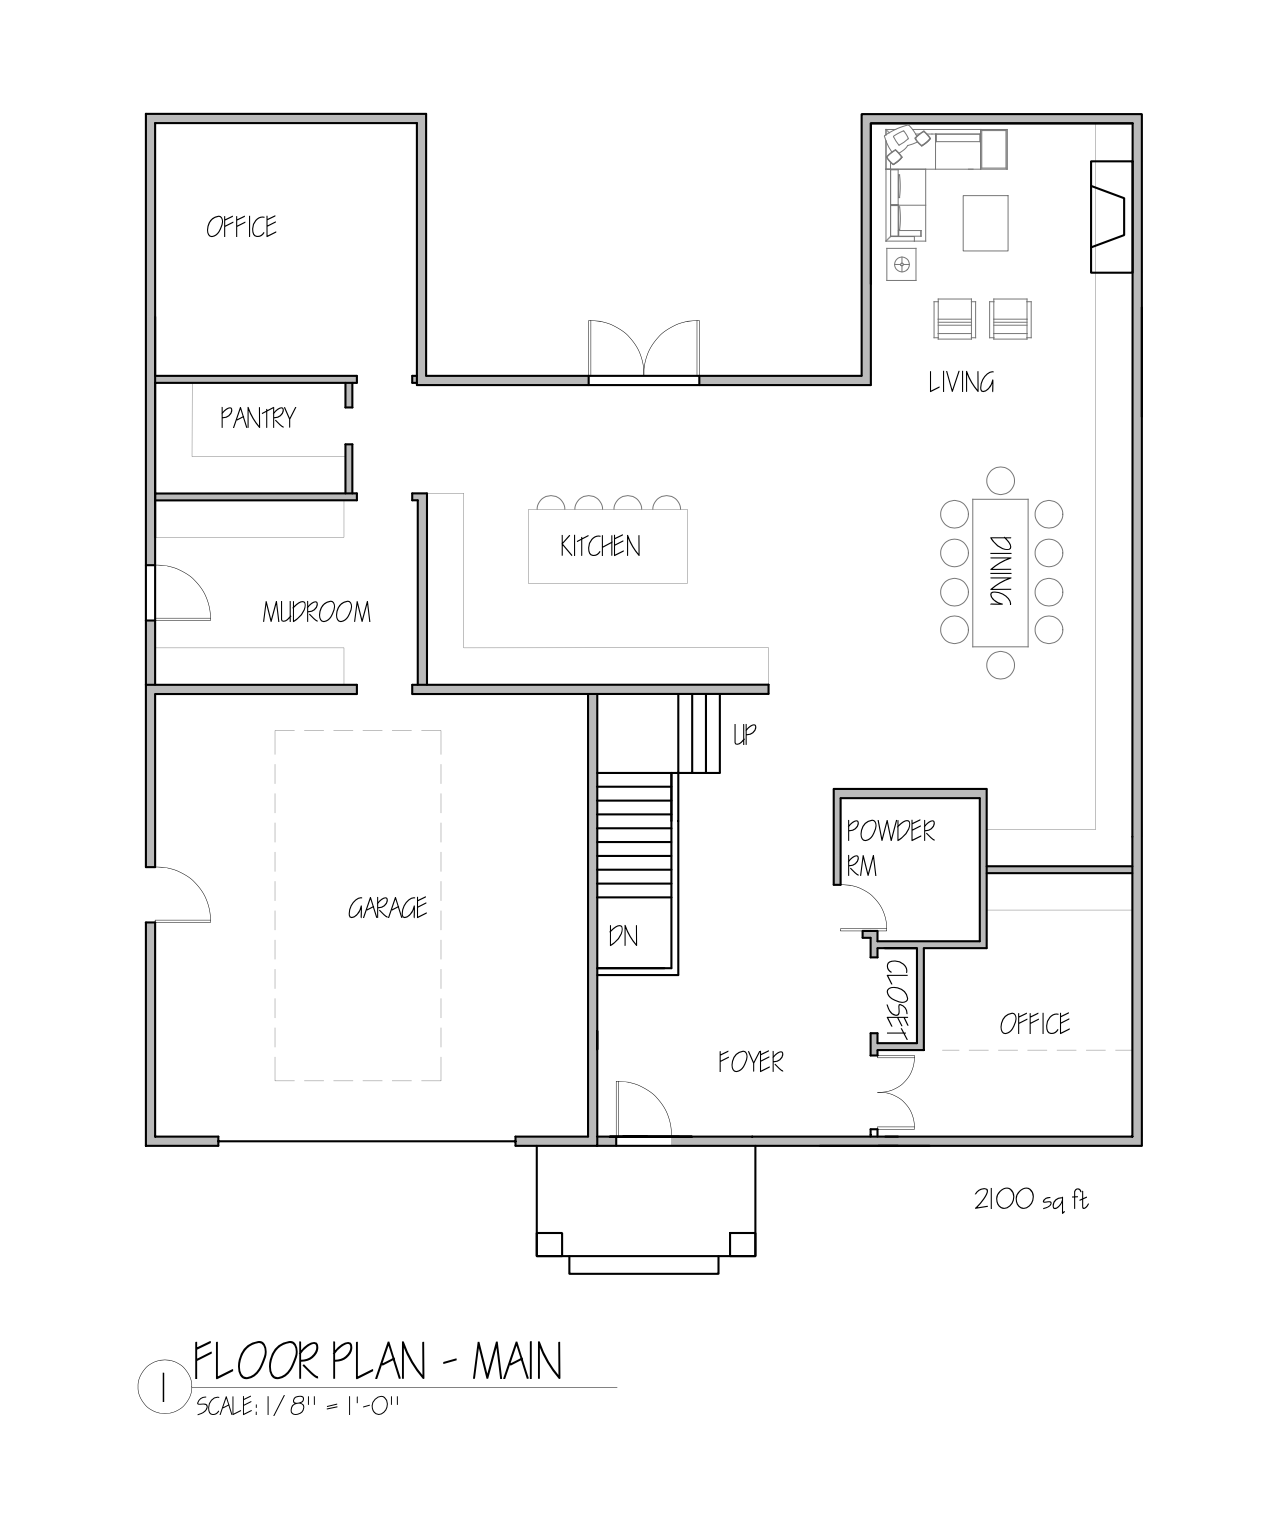
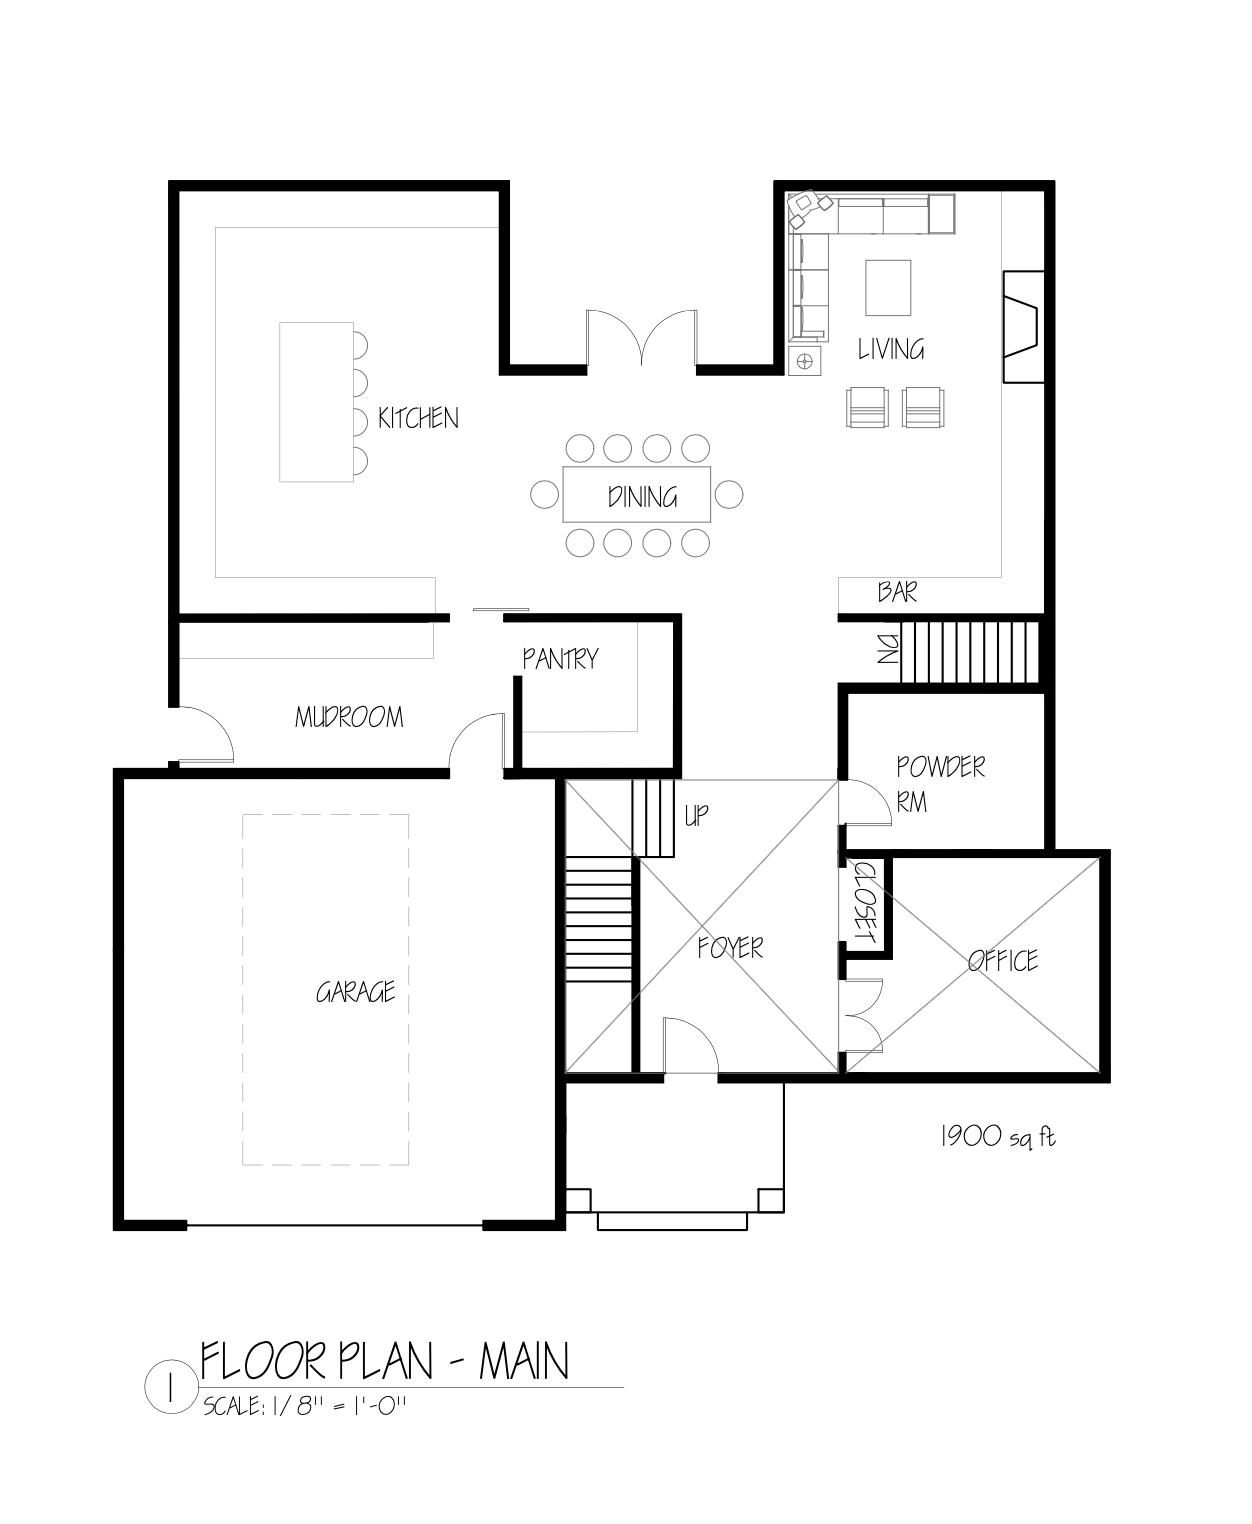
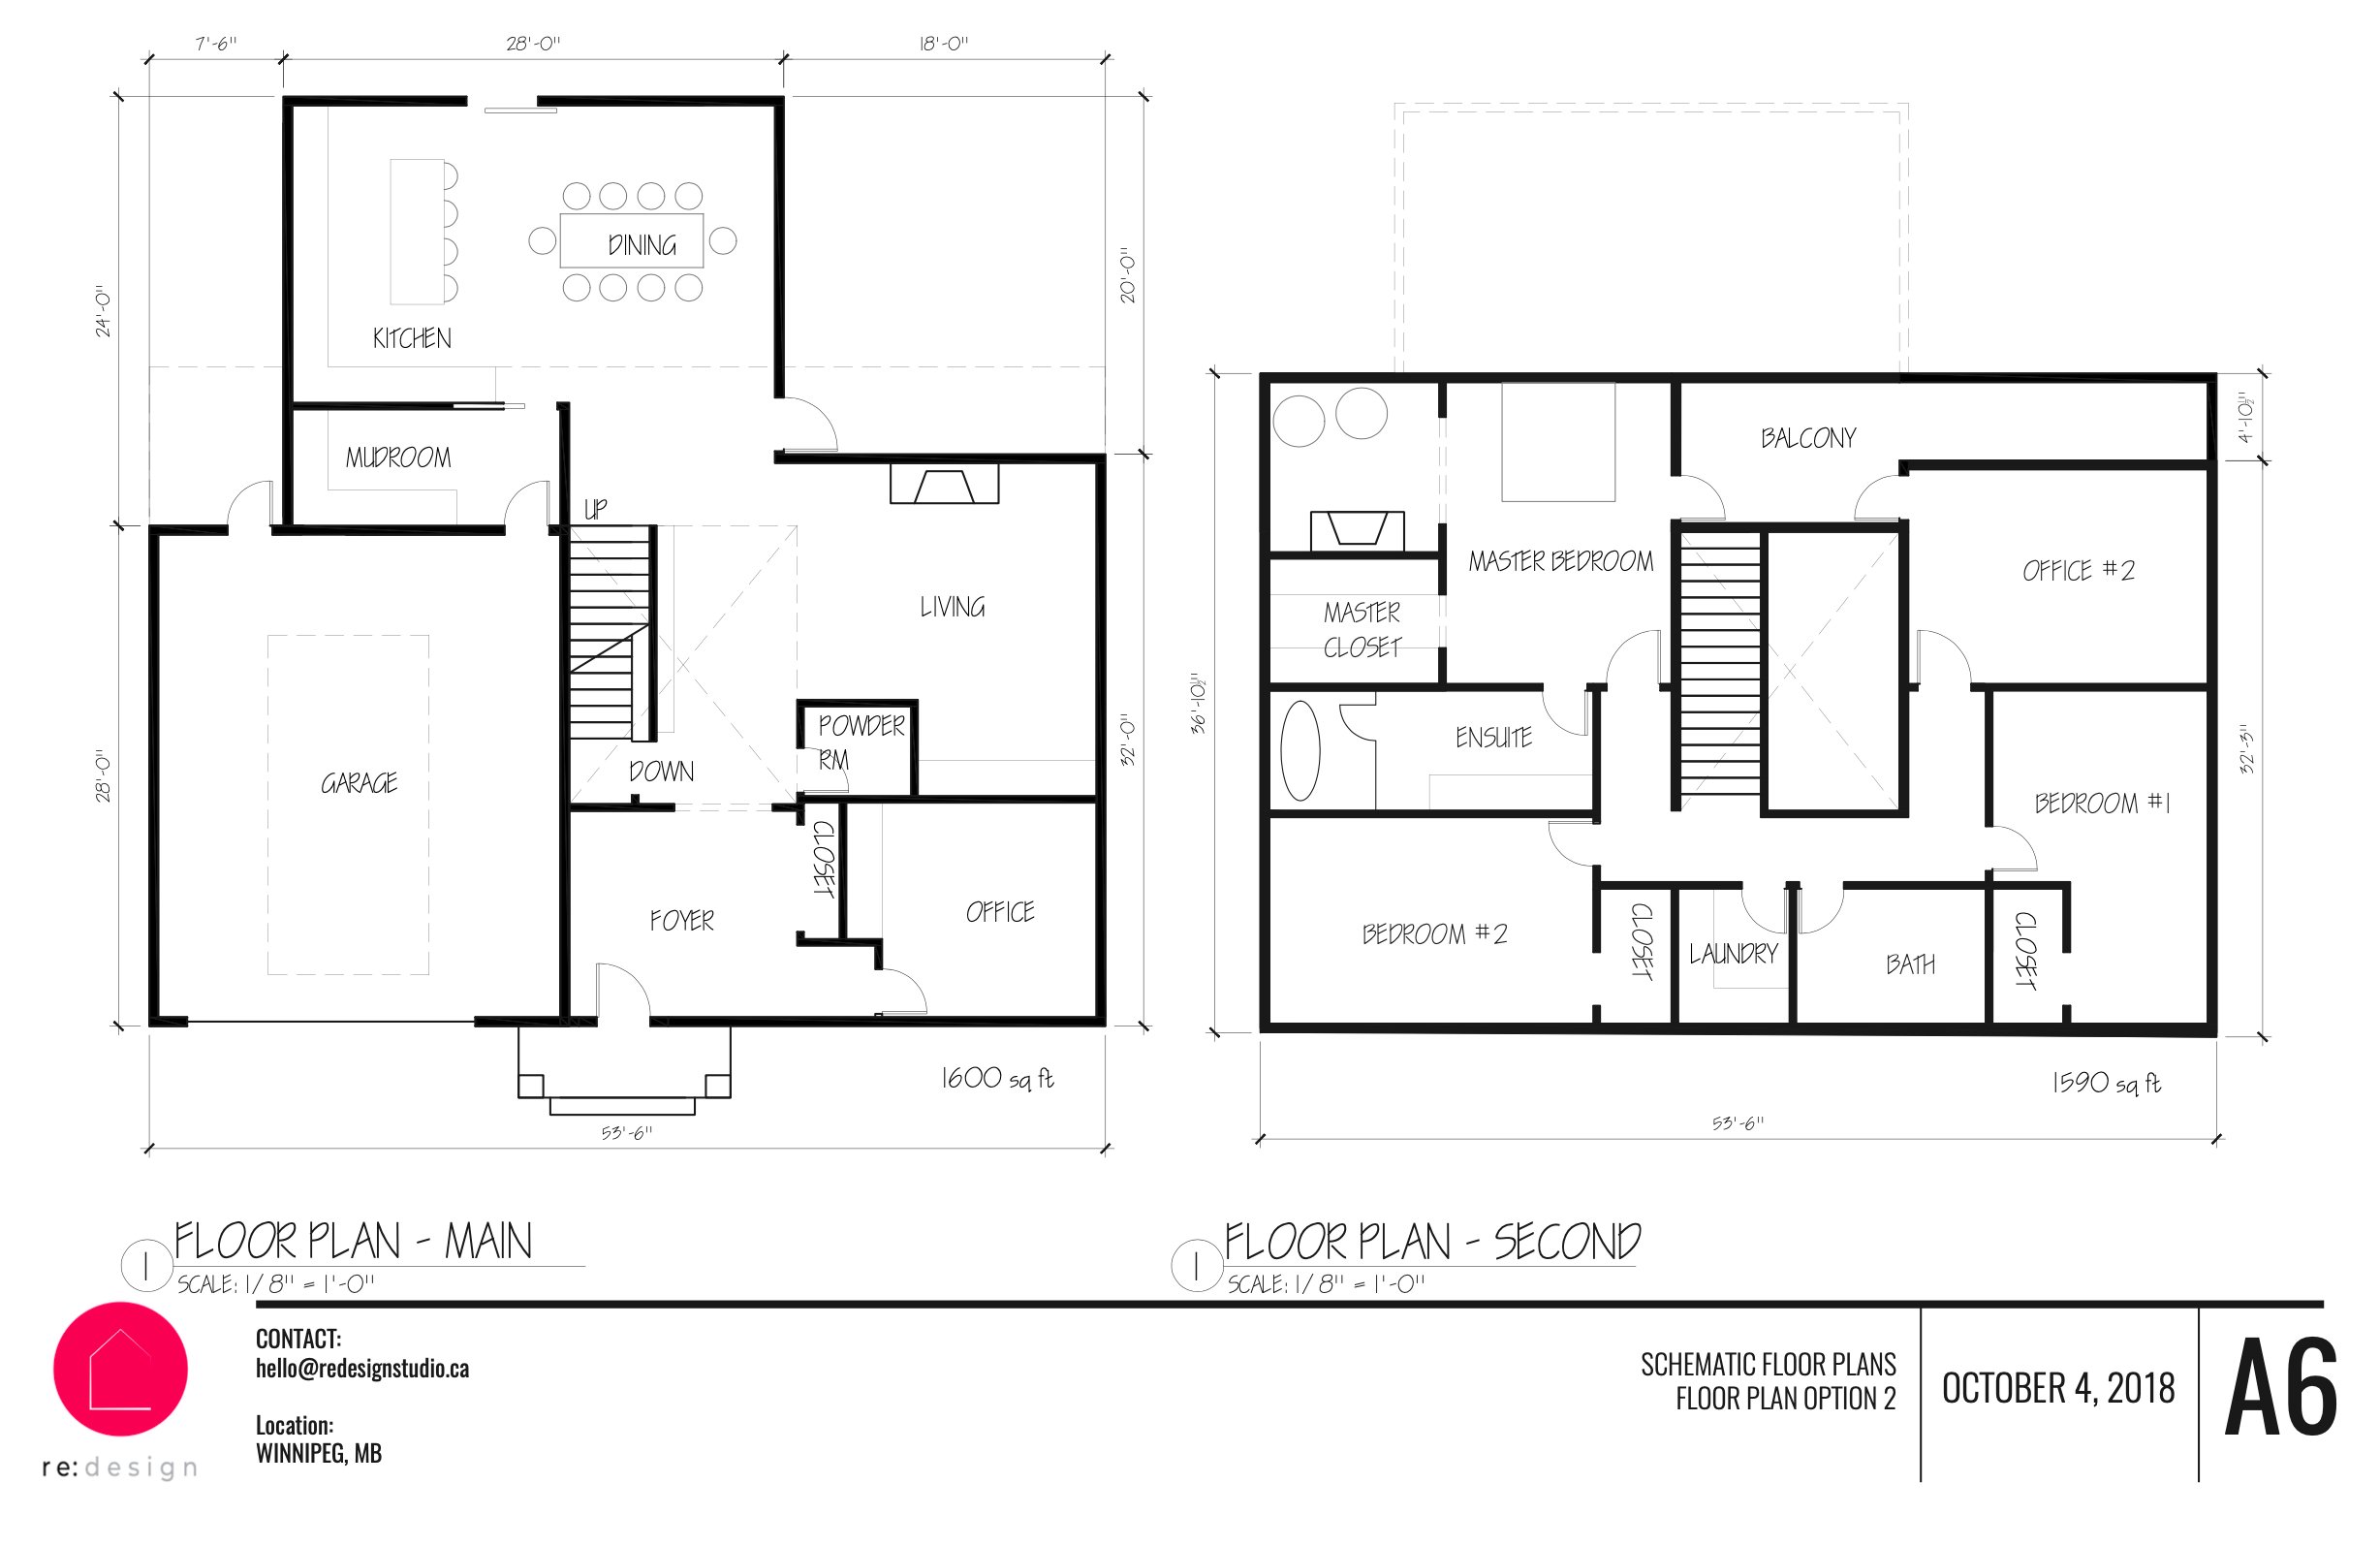
Now that we had the exterior form decided on, it was time for some fine tuning of the interior space planning. Working within the foot print to create the flow that best suited the clients was the priority and with some back and forth, this was the final layout!

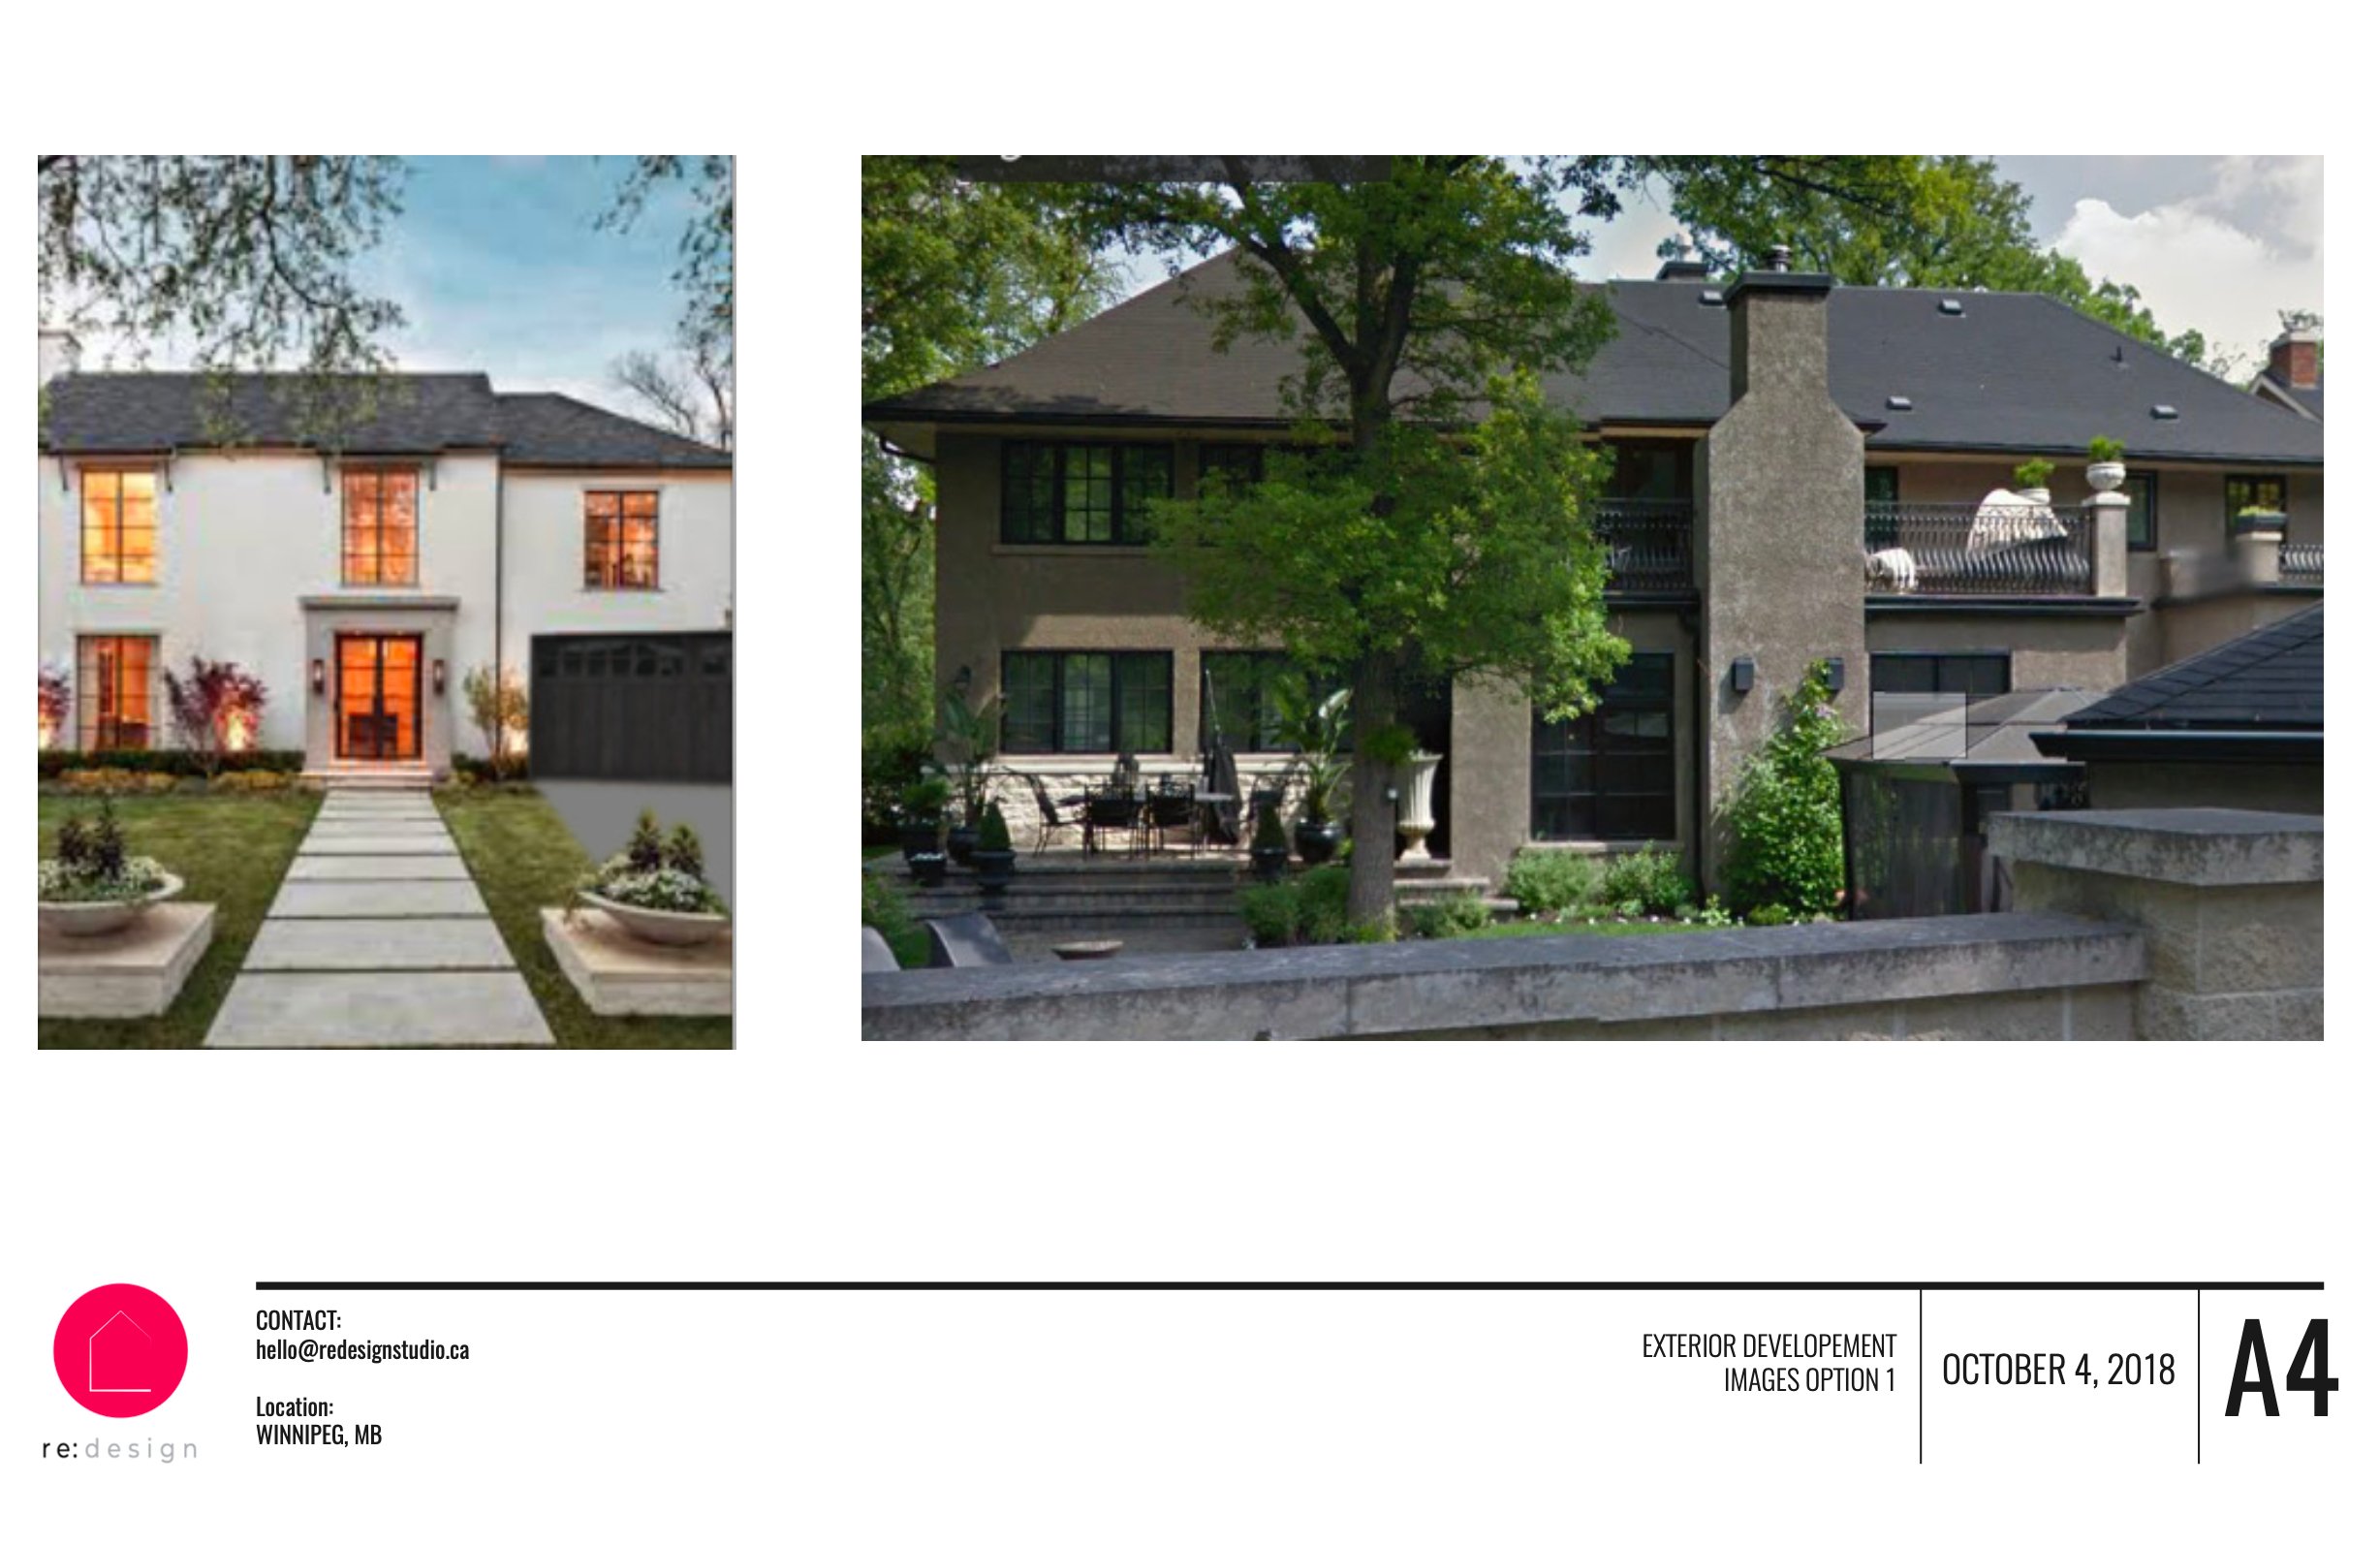
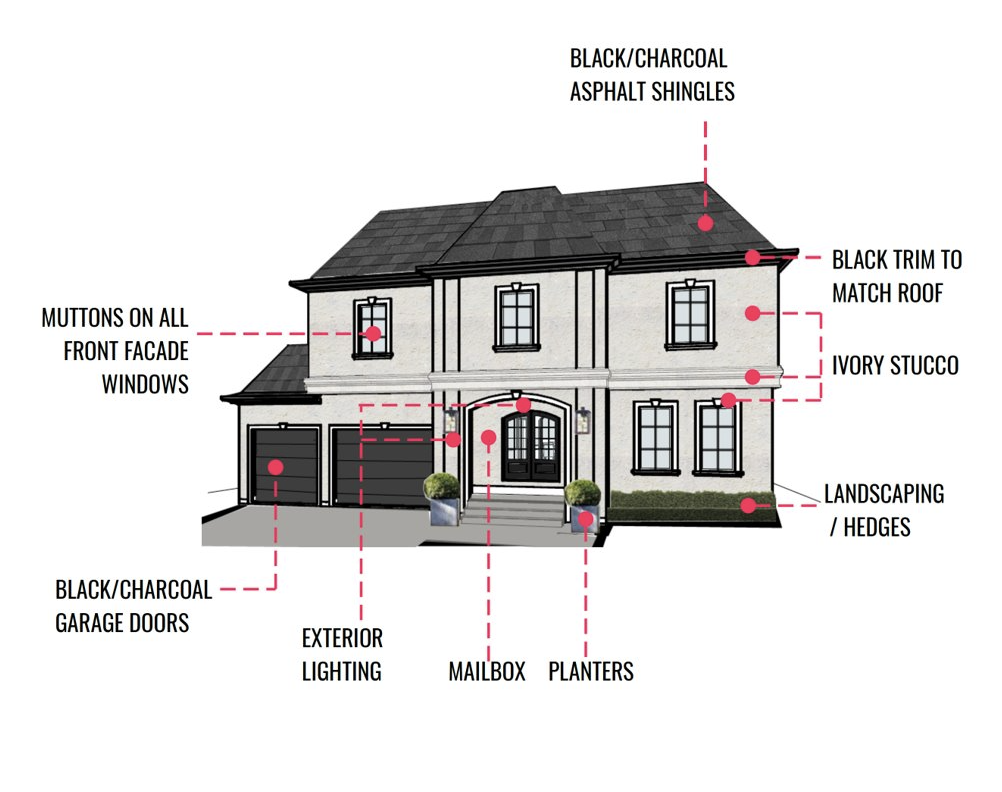
With the form and interior layout completed, it was time to work out the final exterior design. We had the concepts for the style already sorted out, but they needed to be applied to the new form. Without boring you with all of the technical details, here is the pretty rendering of how it translated to the form:
This is also the point where we like to have the design priced before moving further into the details. If the design is coming in way over budget, we need to know why, so revisions can be made or at least have it help to guide what kind of finishes we can select as we move on to the next phase.
If all checks out with pricing, the schematic design drawings become permit drawings that incorporate all the technical information that needs to be submitted to the city for approval. These drawings are stamped and become the set that the builder uses to build the house.
We separate this from the interior drawing package for efficiency. The permit set does not need to include any of the interior information, so while they are off for approval, we continue to work with the clients to get the interior set ready. A quick note that is important to know is that in the permit drawings process, there was some tweaking to the layout, but all very minor.
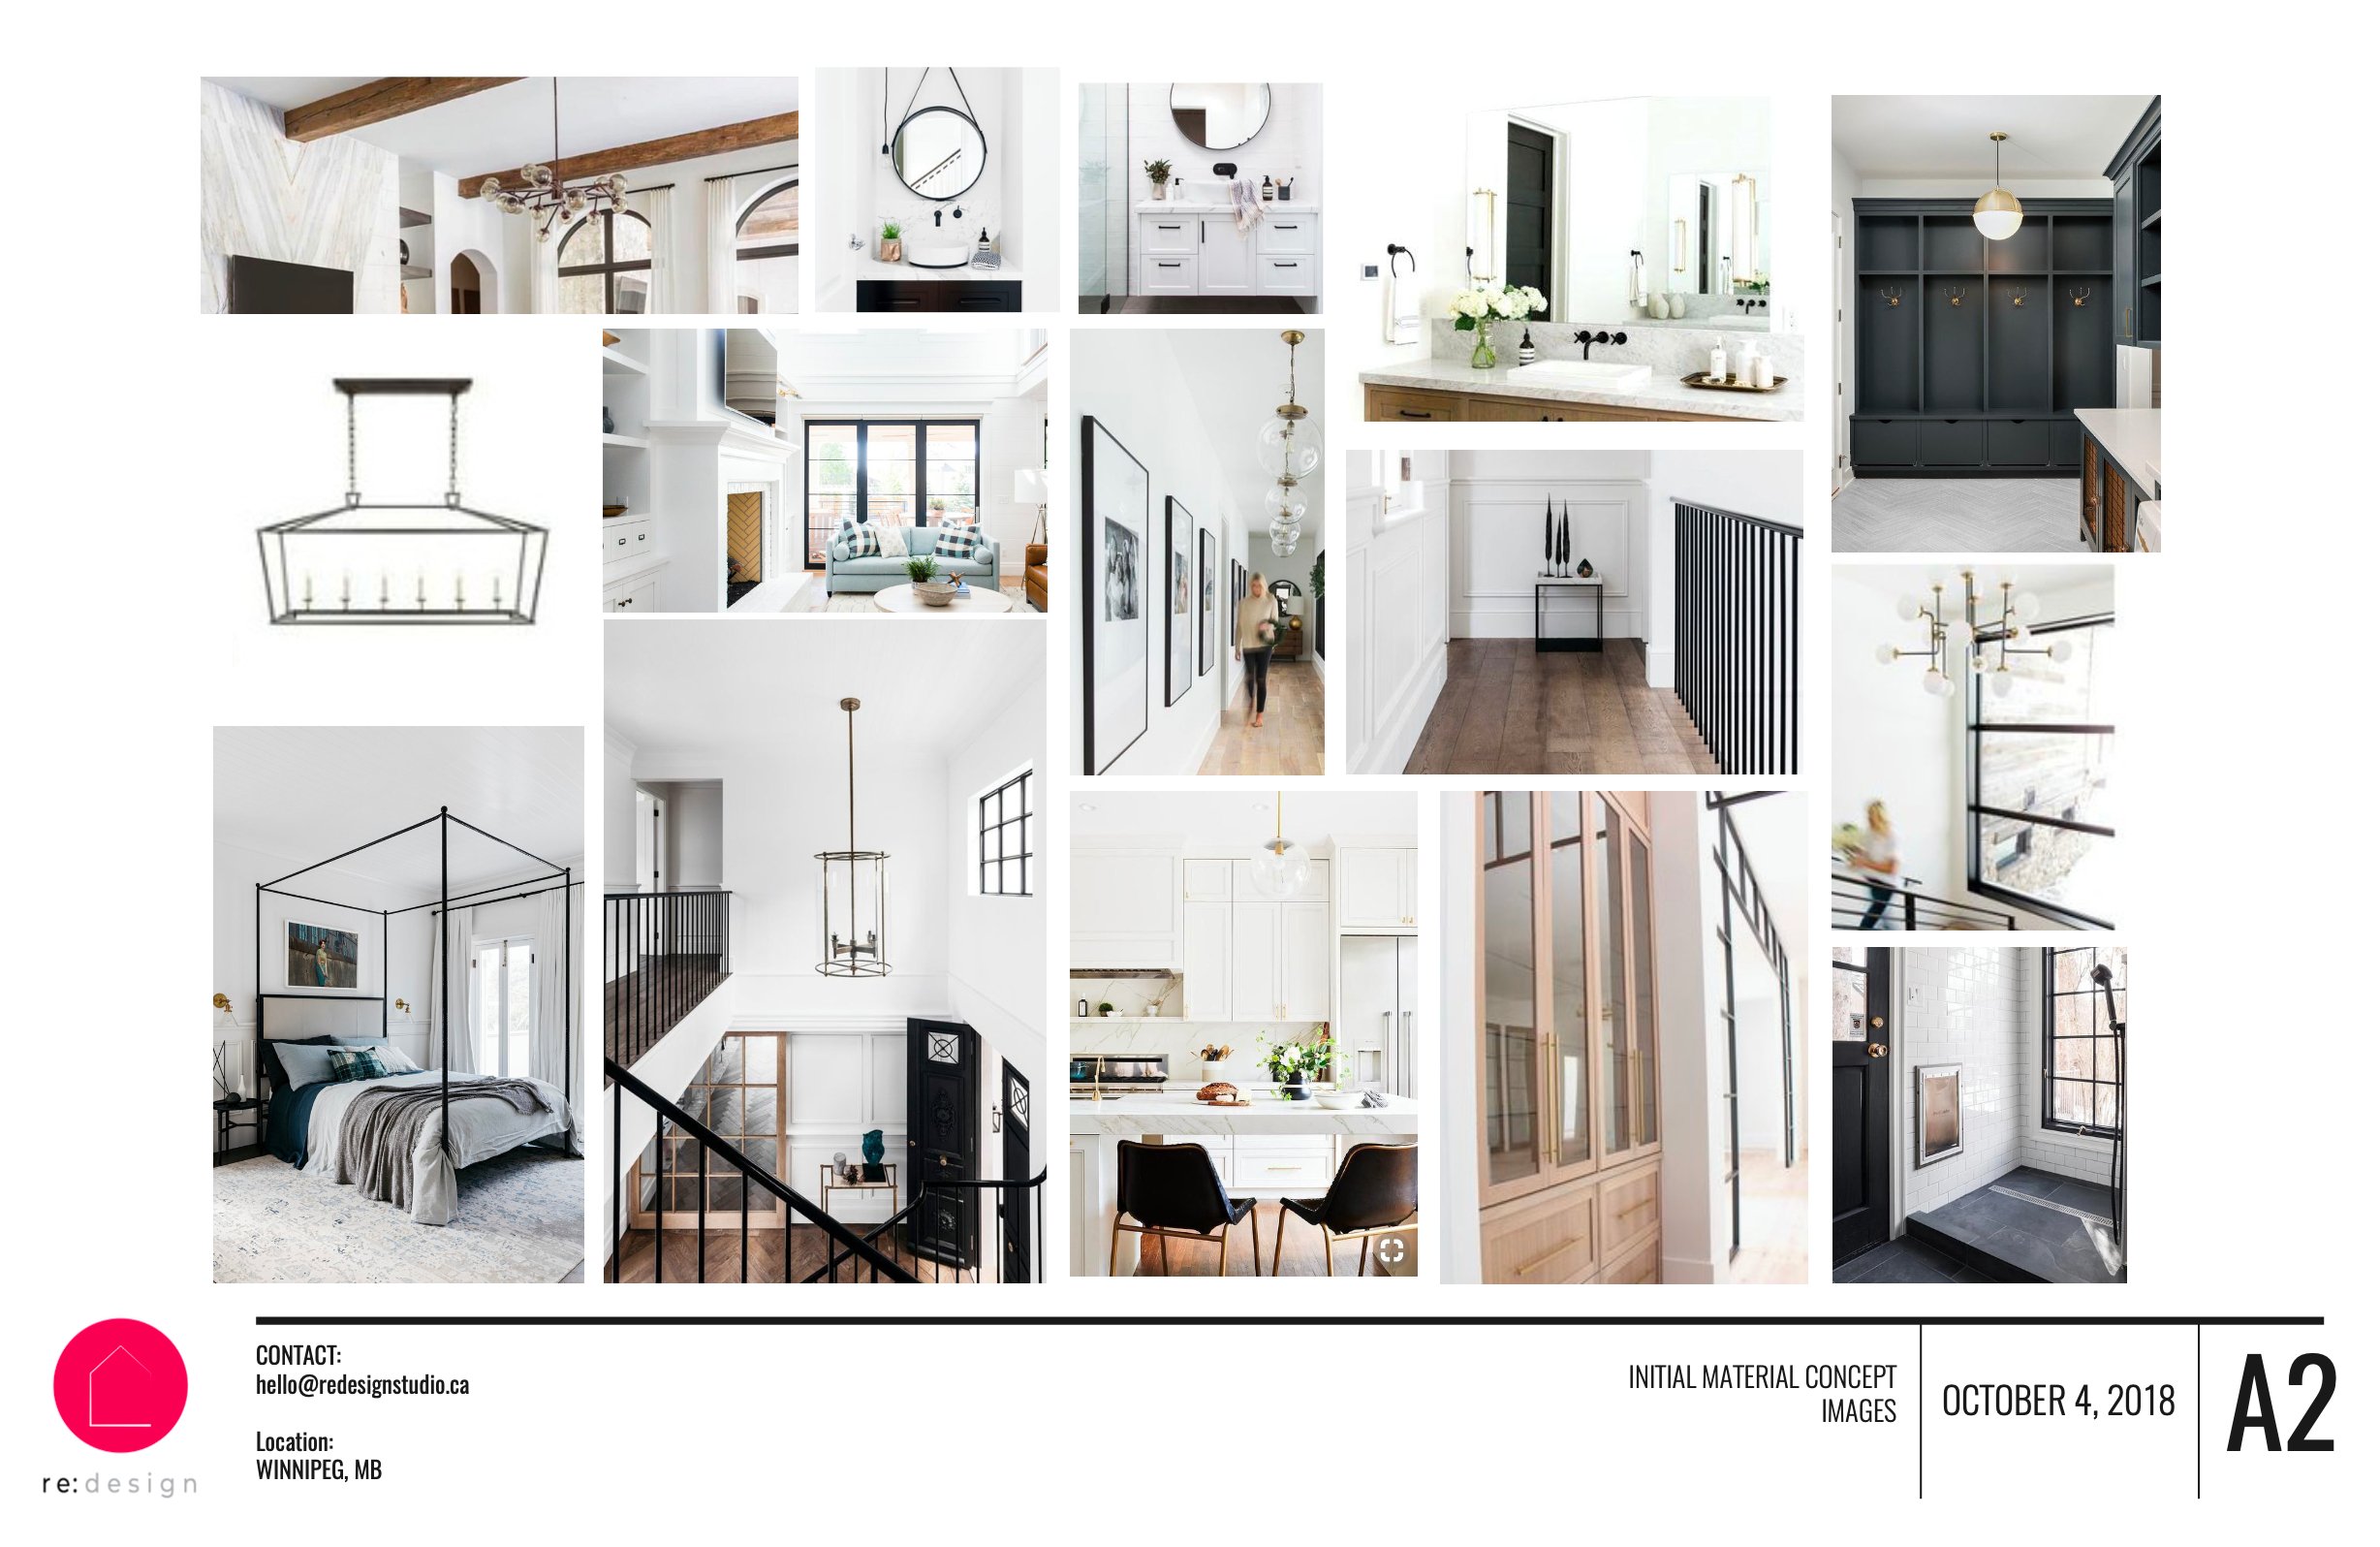
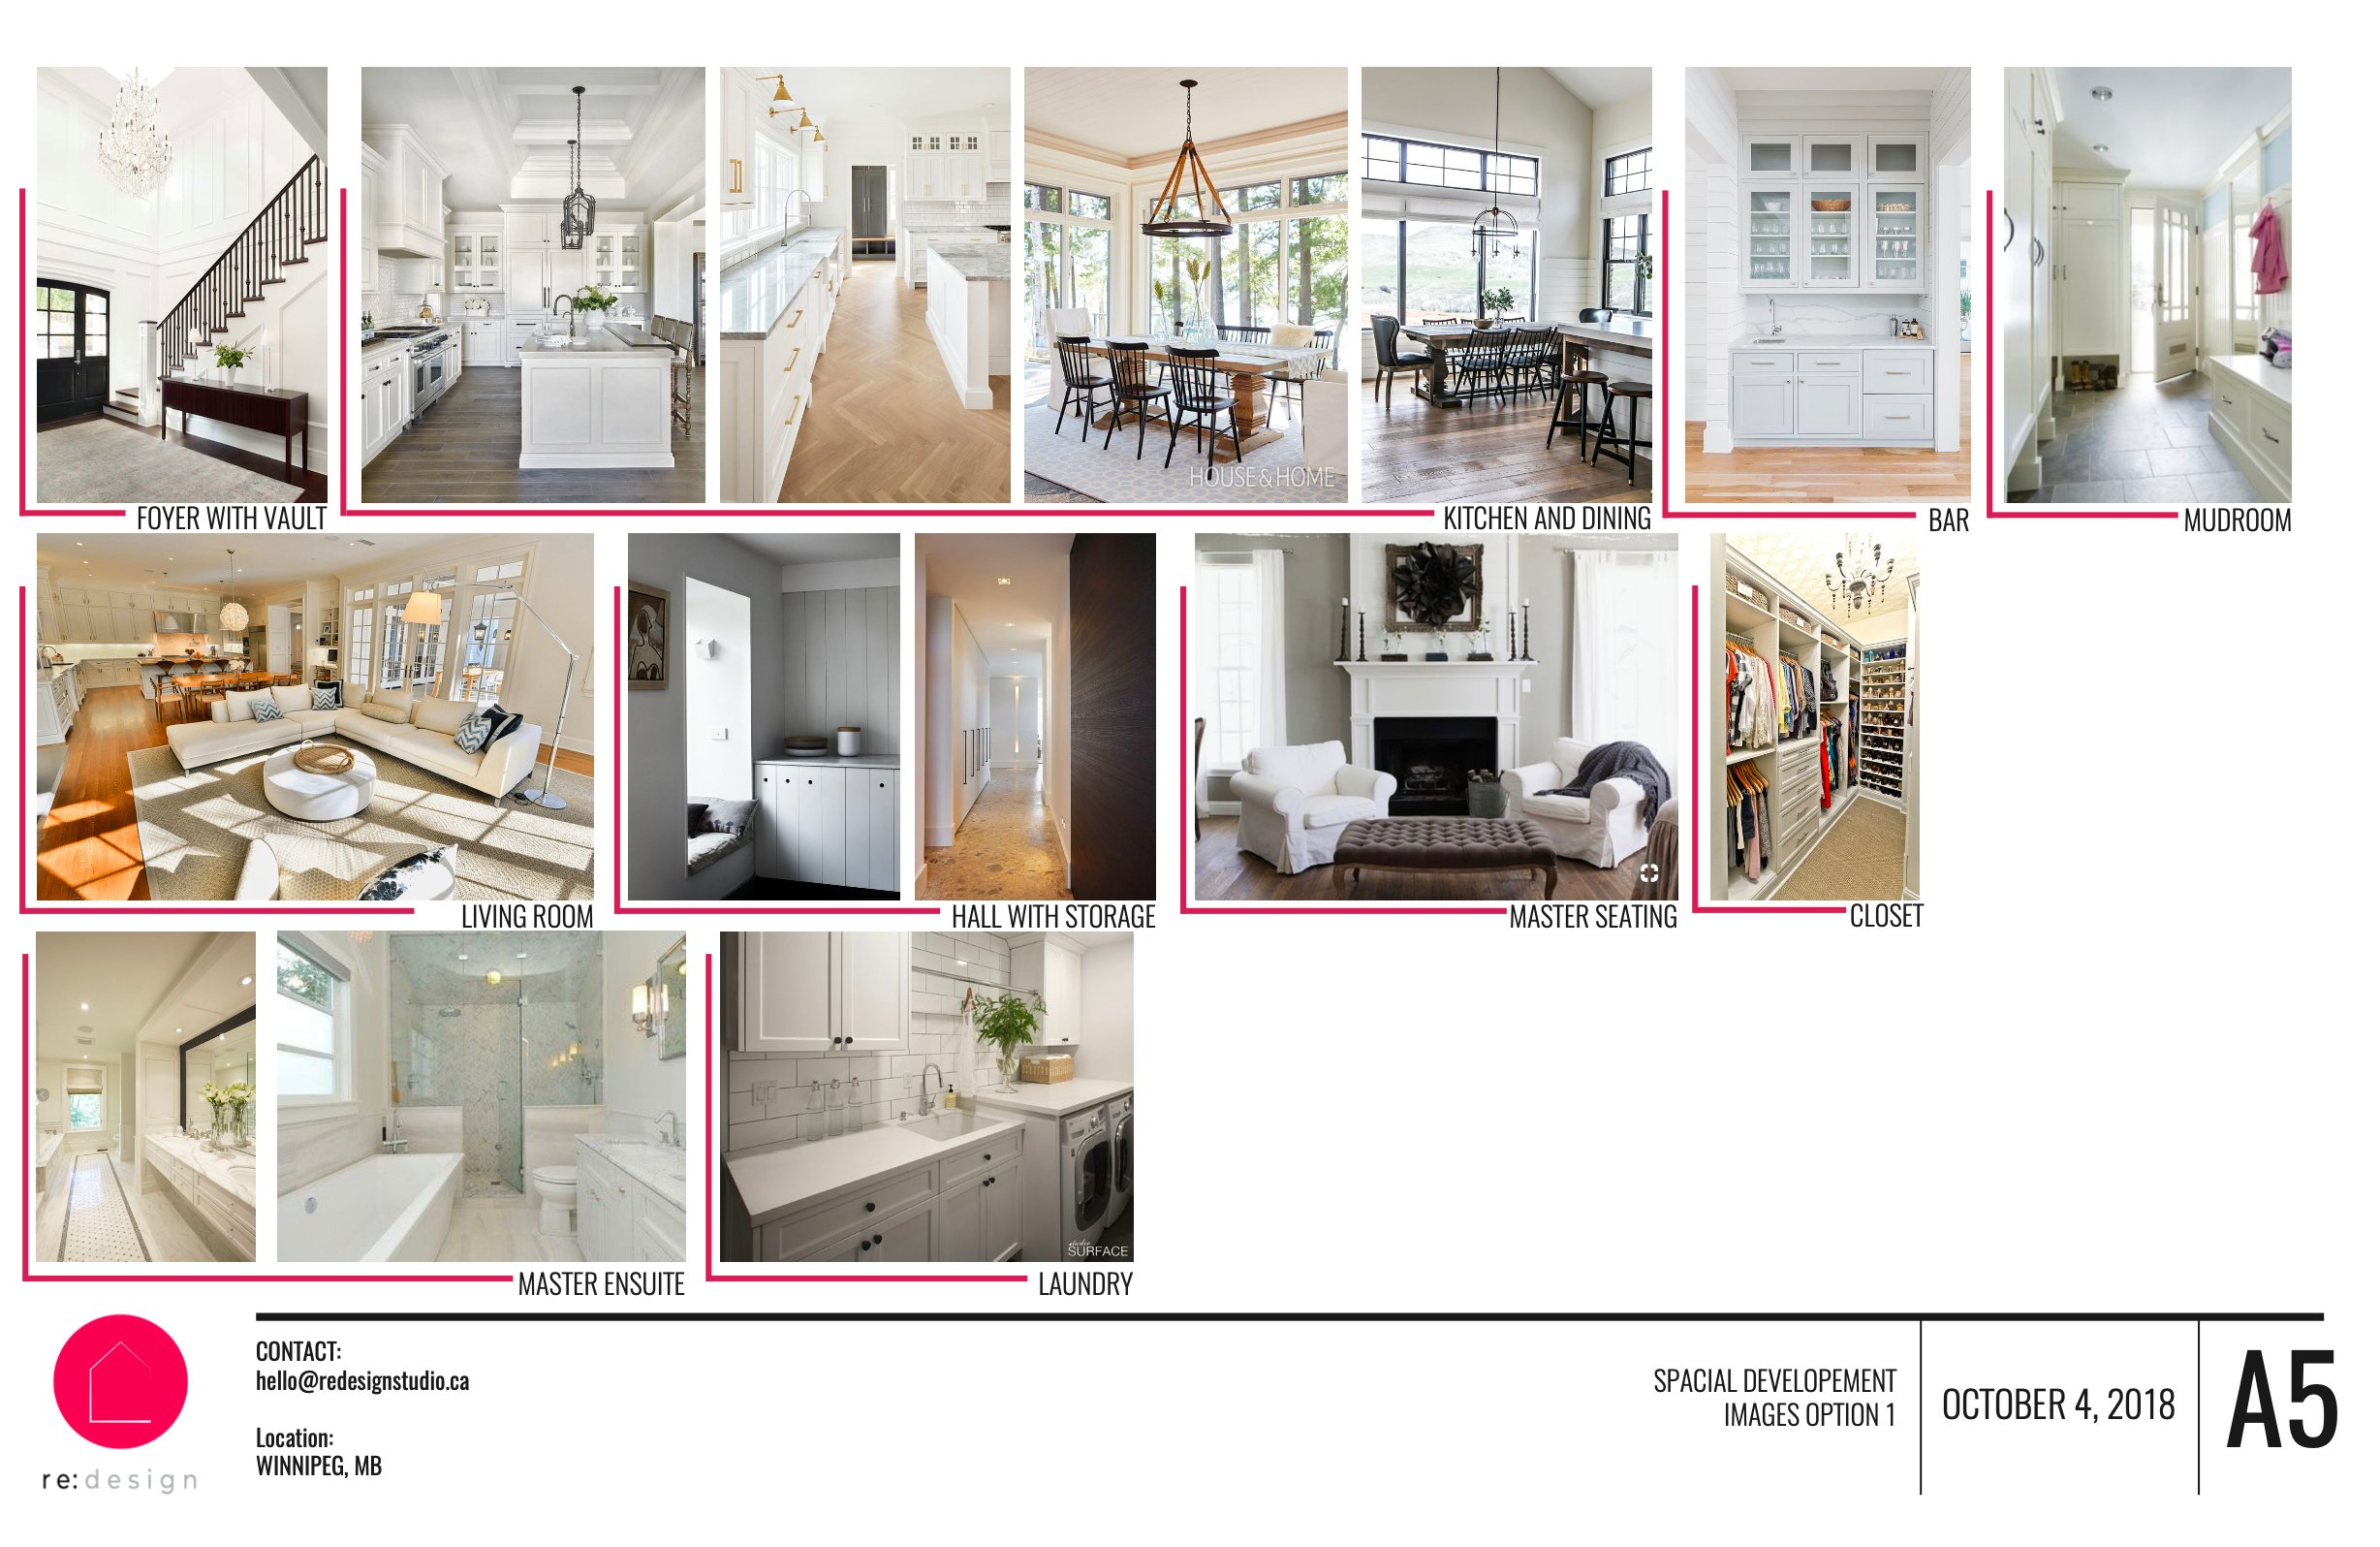
Interior Styling and Details:
With the budget as a guideline, we can now start to work on the interior details. These clients were hands on and wanted us to provide them with concepts so they could execute the final selections on their own. This is a great option for clients who want to be involved with the build process, which isn’t always the right fit for everyone. Typically what we provide is much more detailed in terms of technical design and specification, but that was not what these clients needed and we never over provide or make clients pay for services they don’t need!
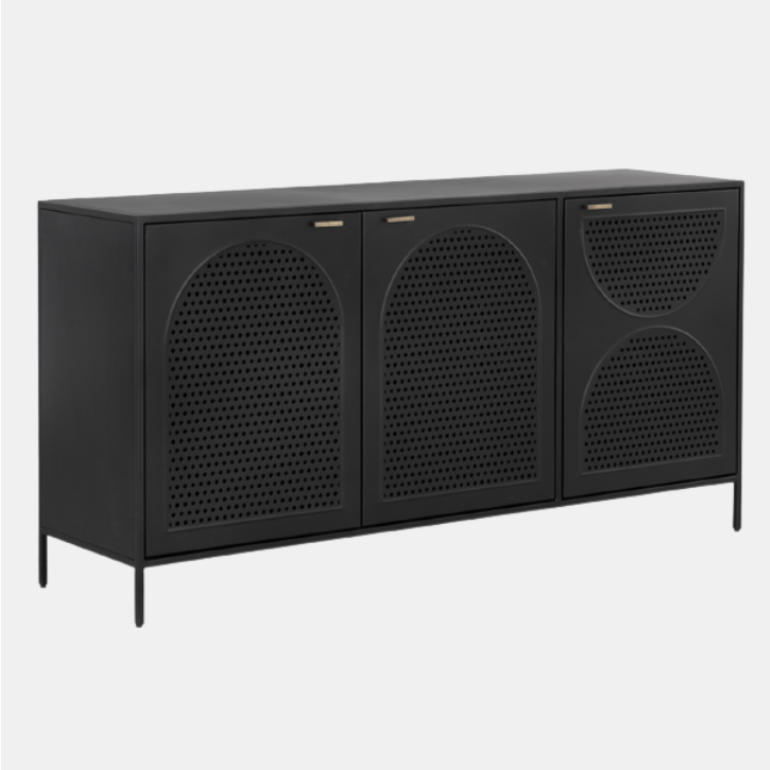
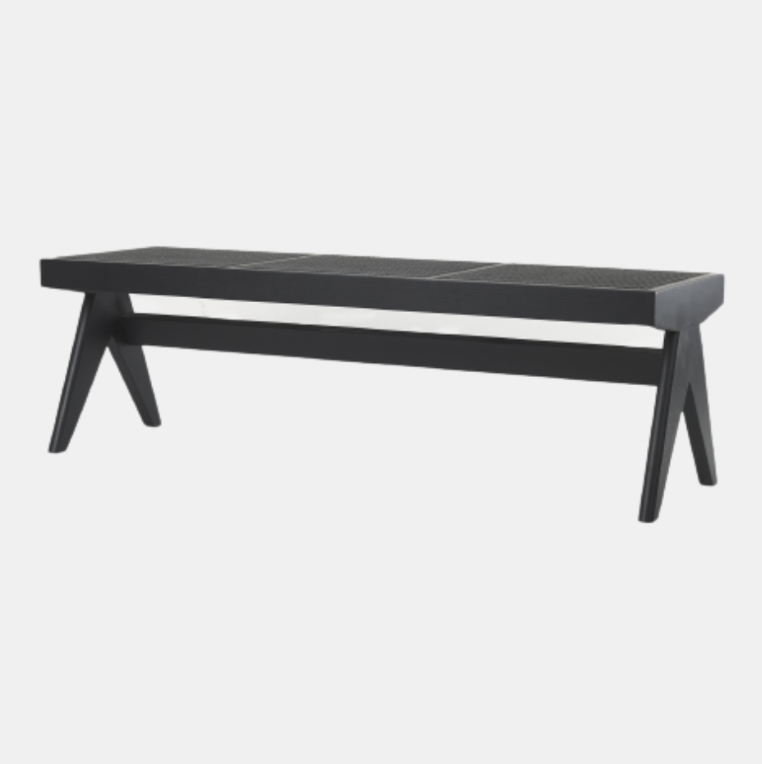
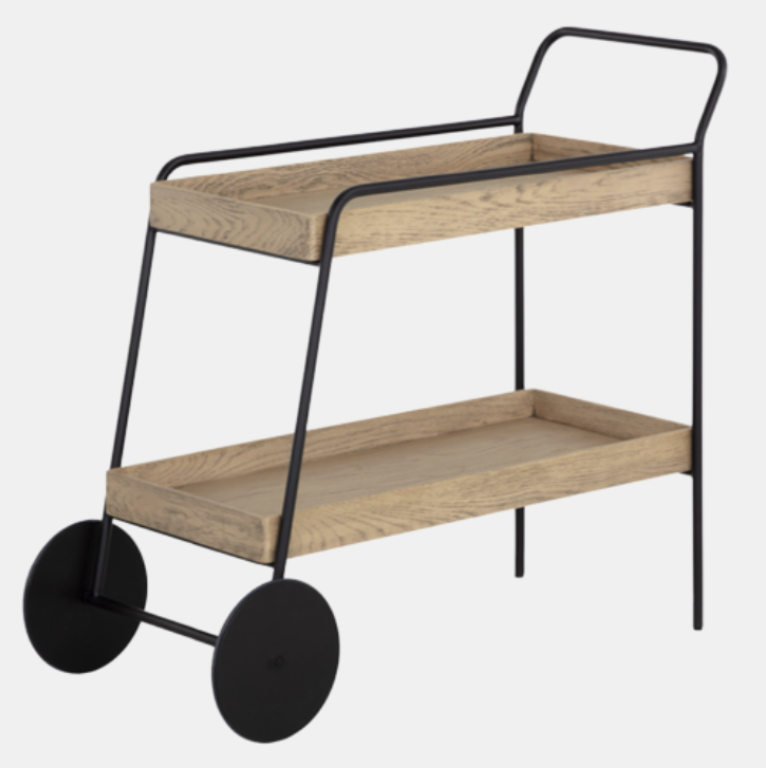
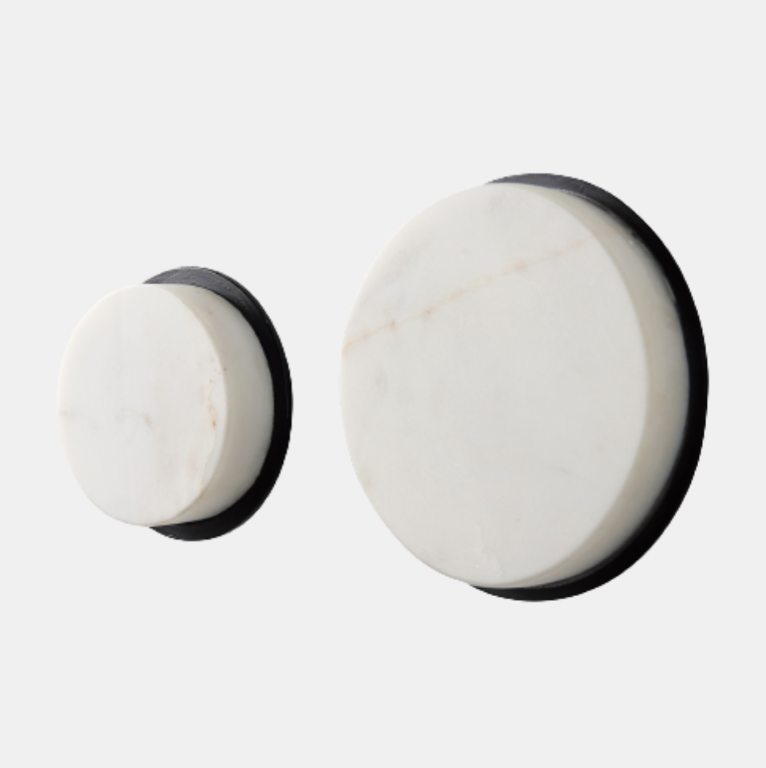
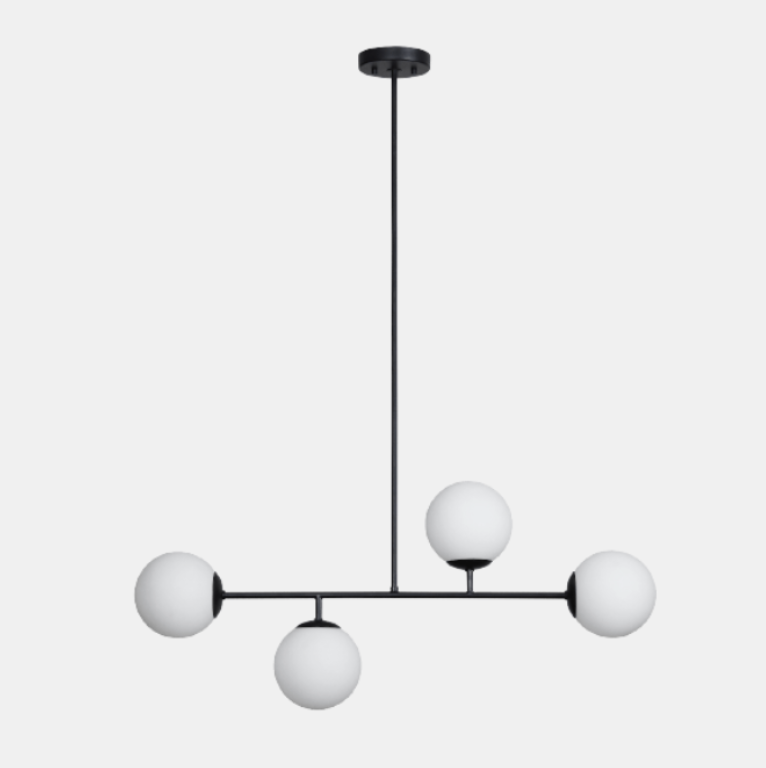
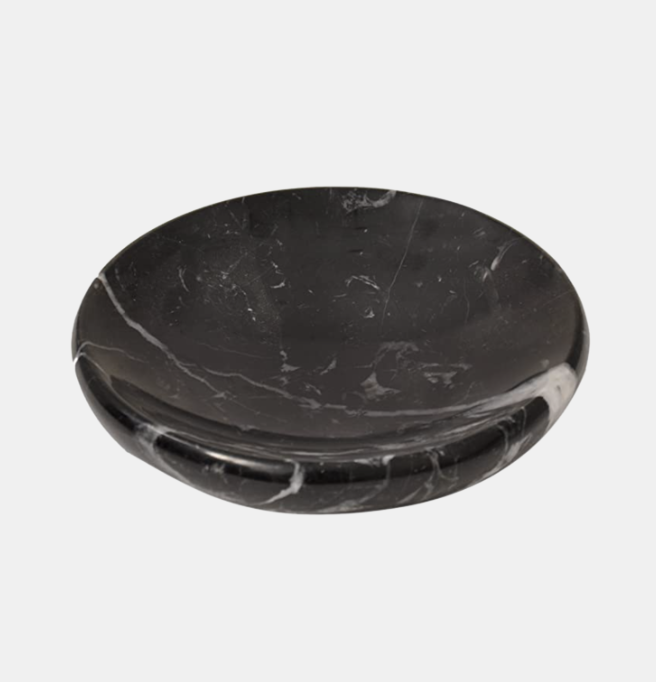
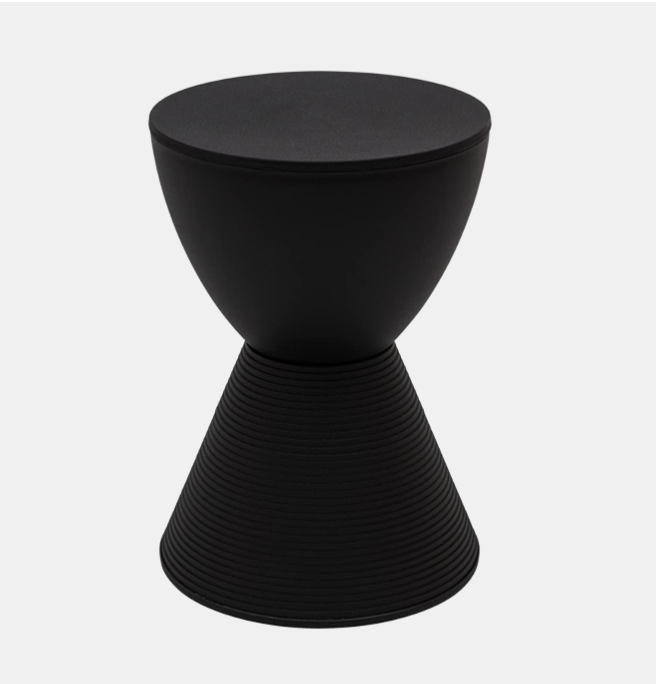
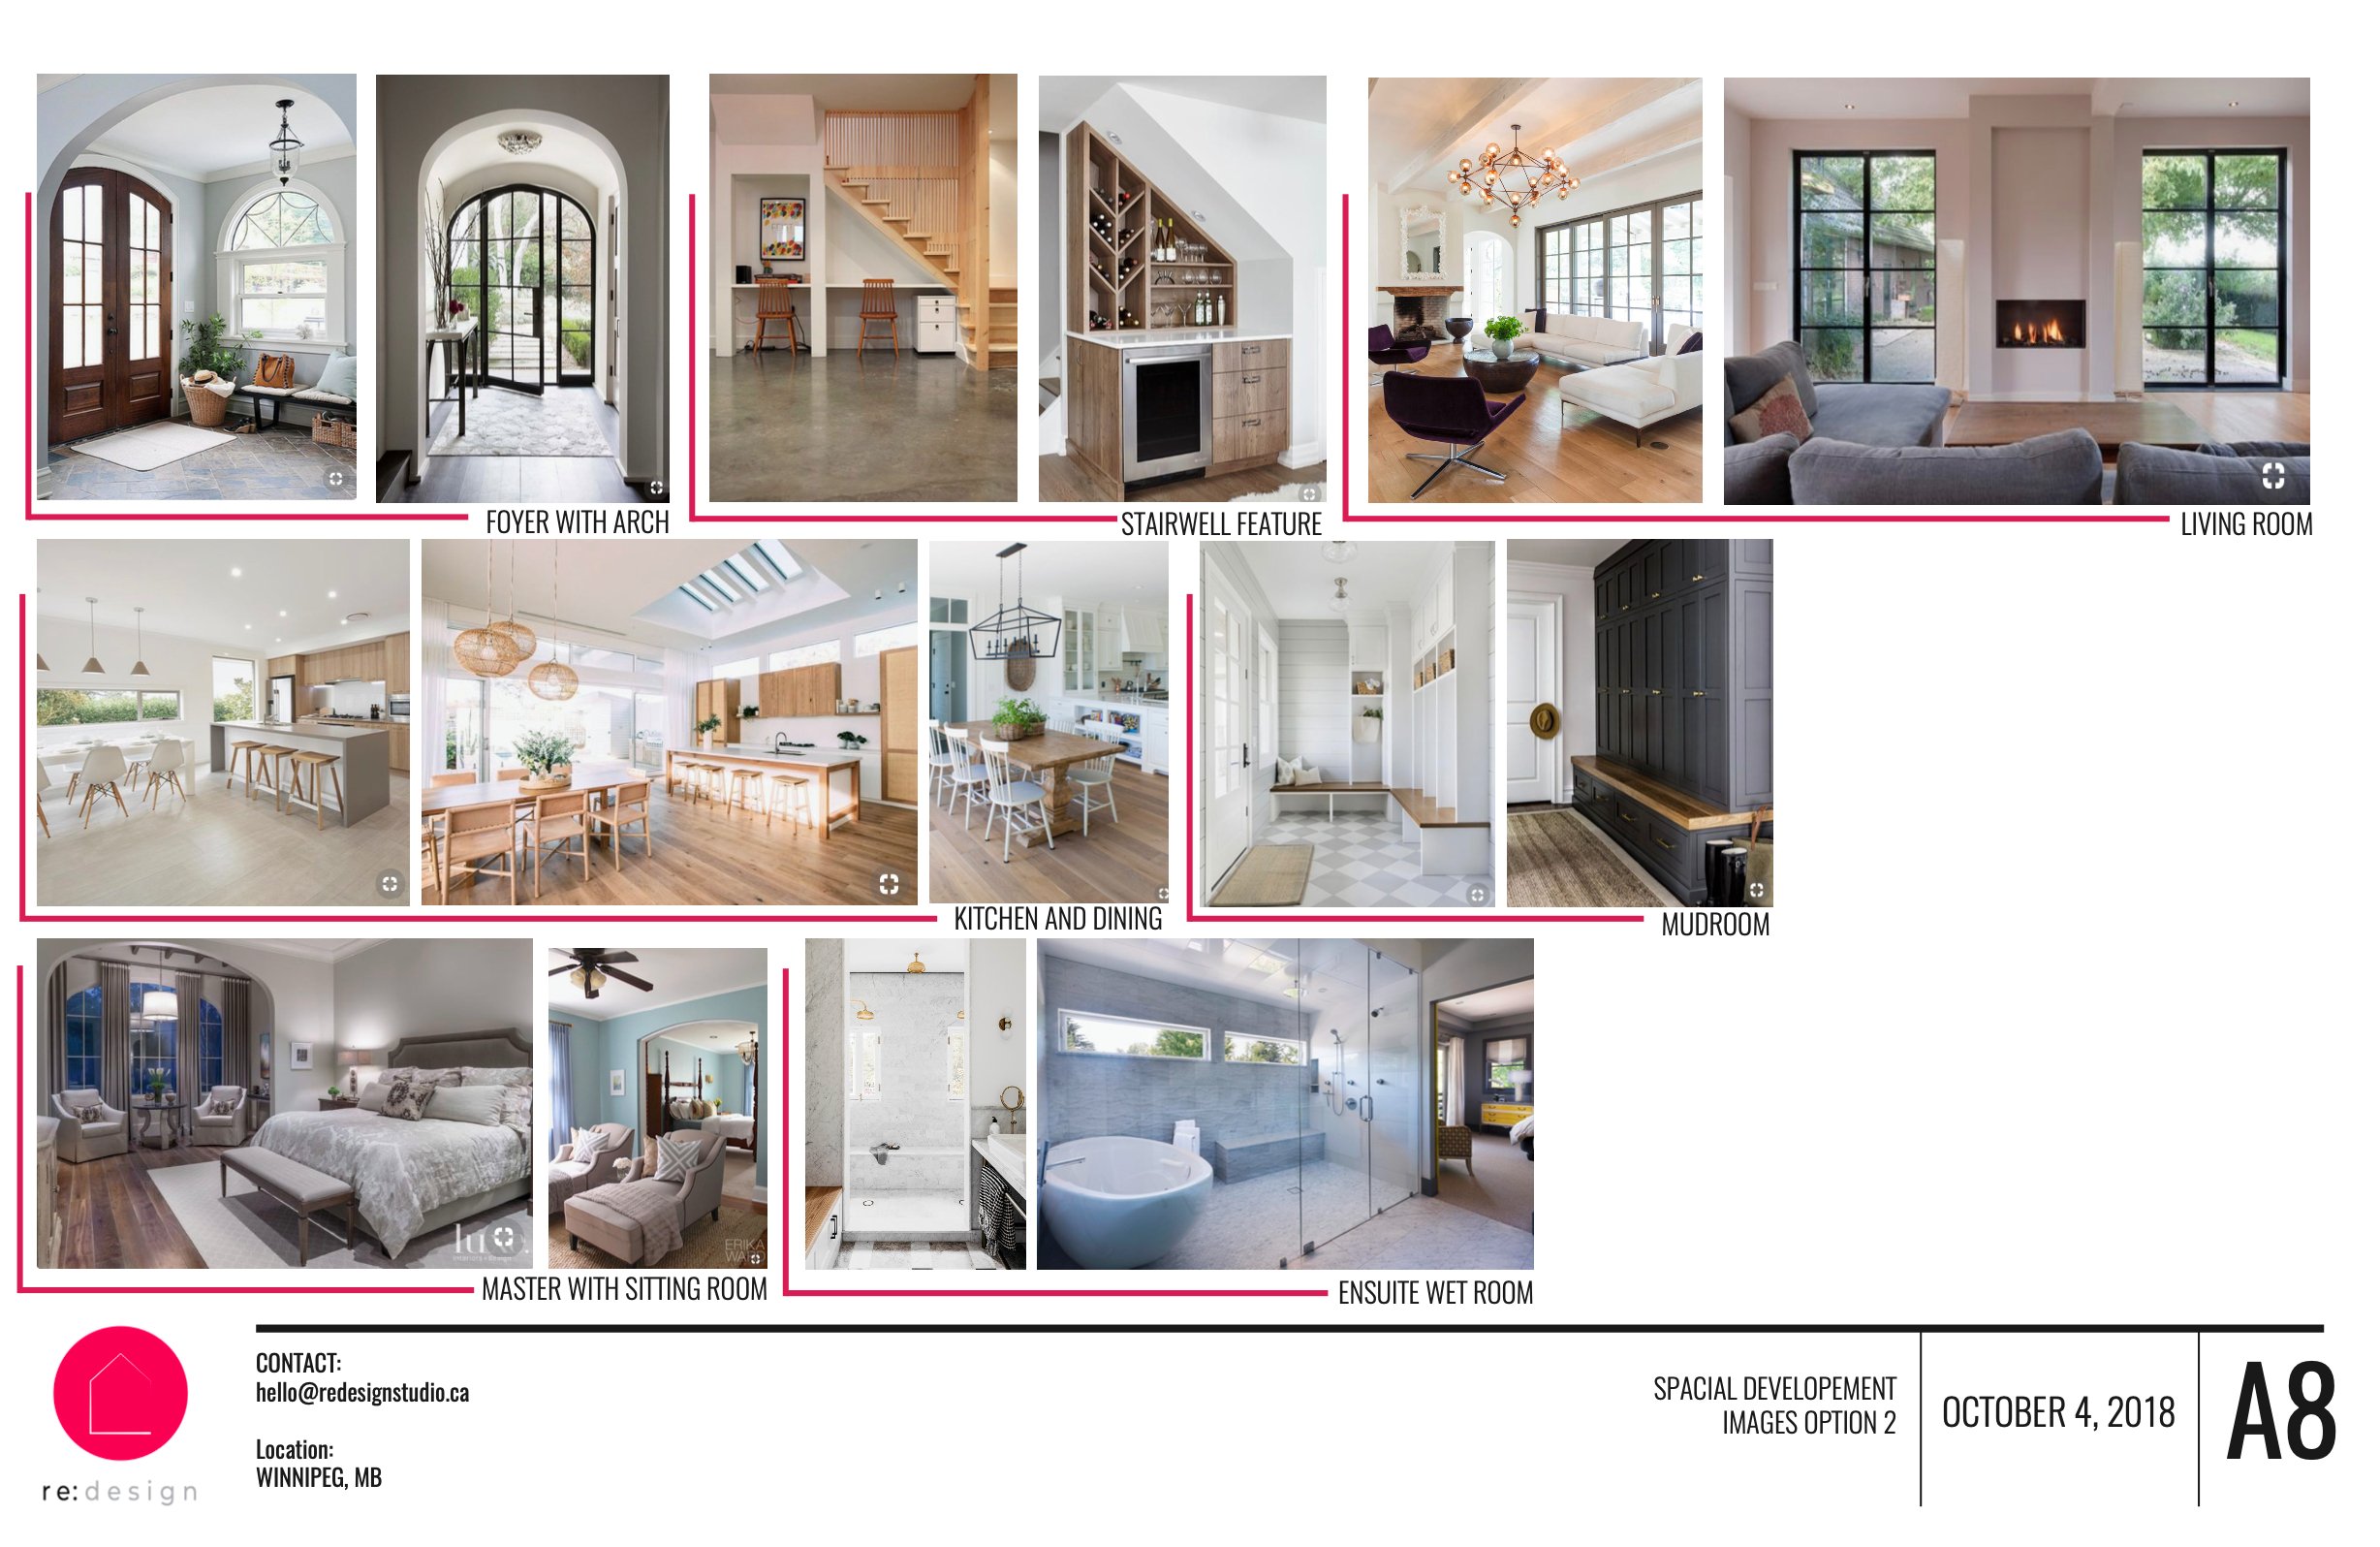
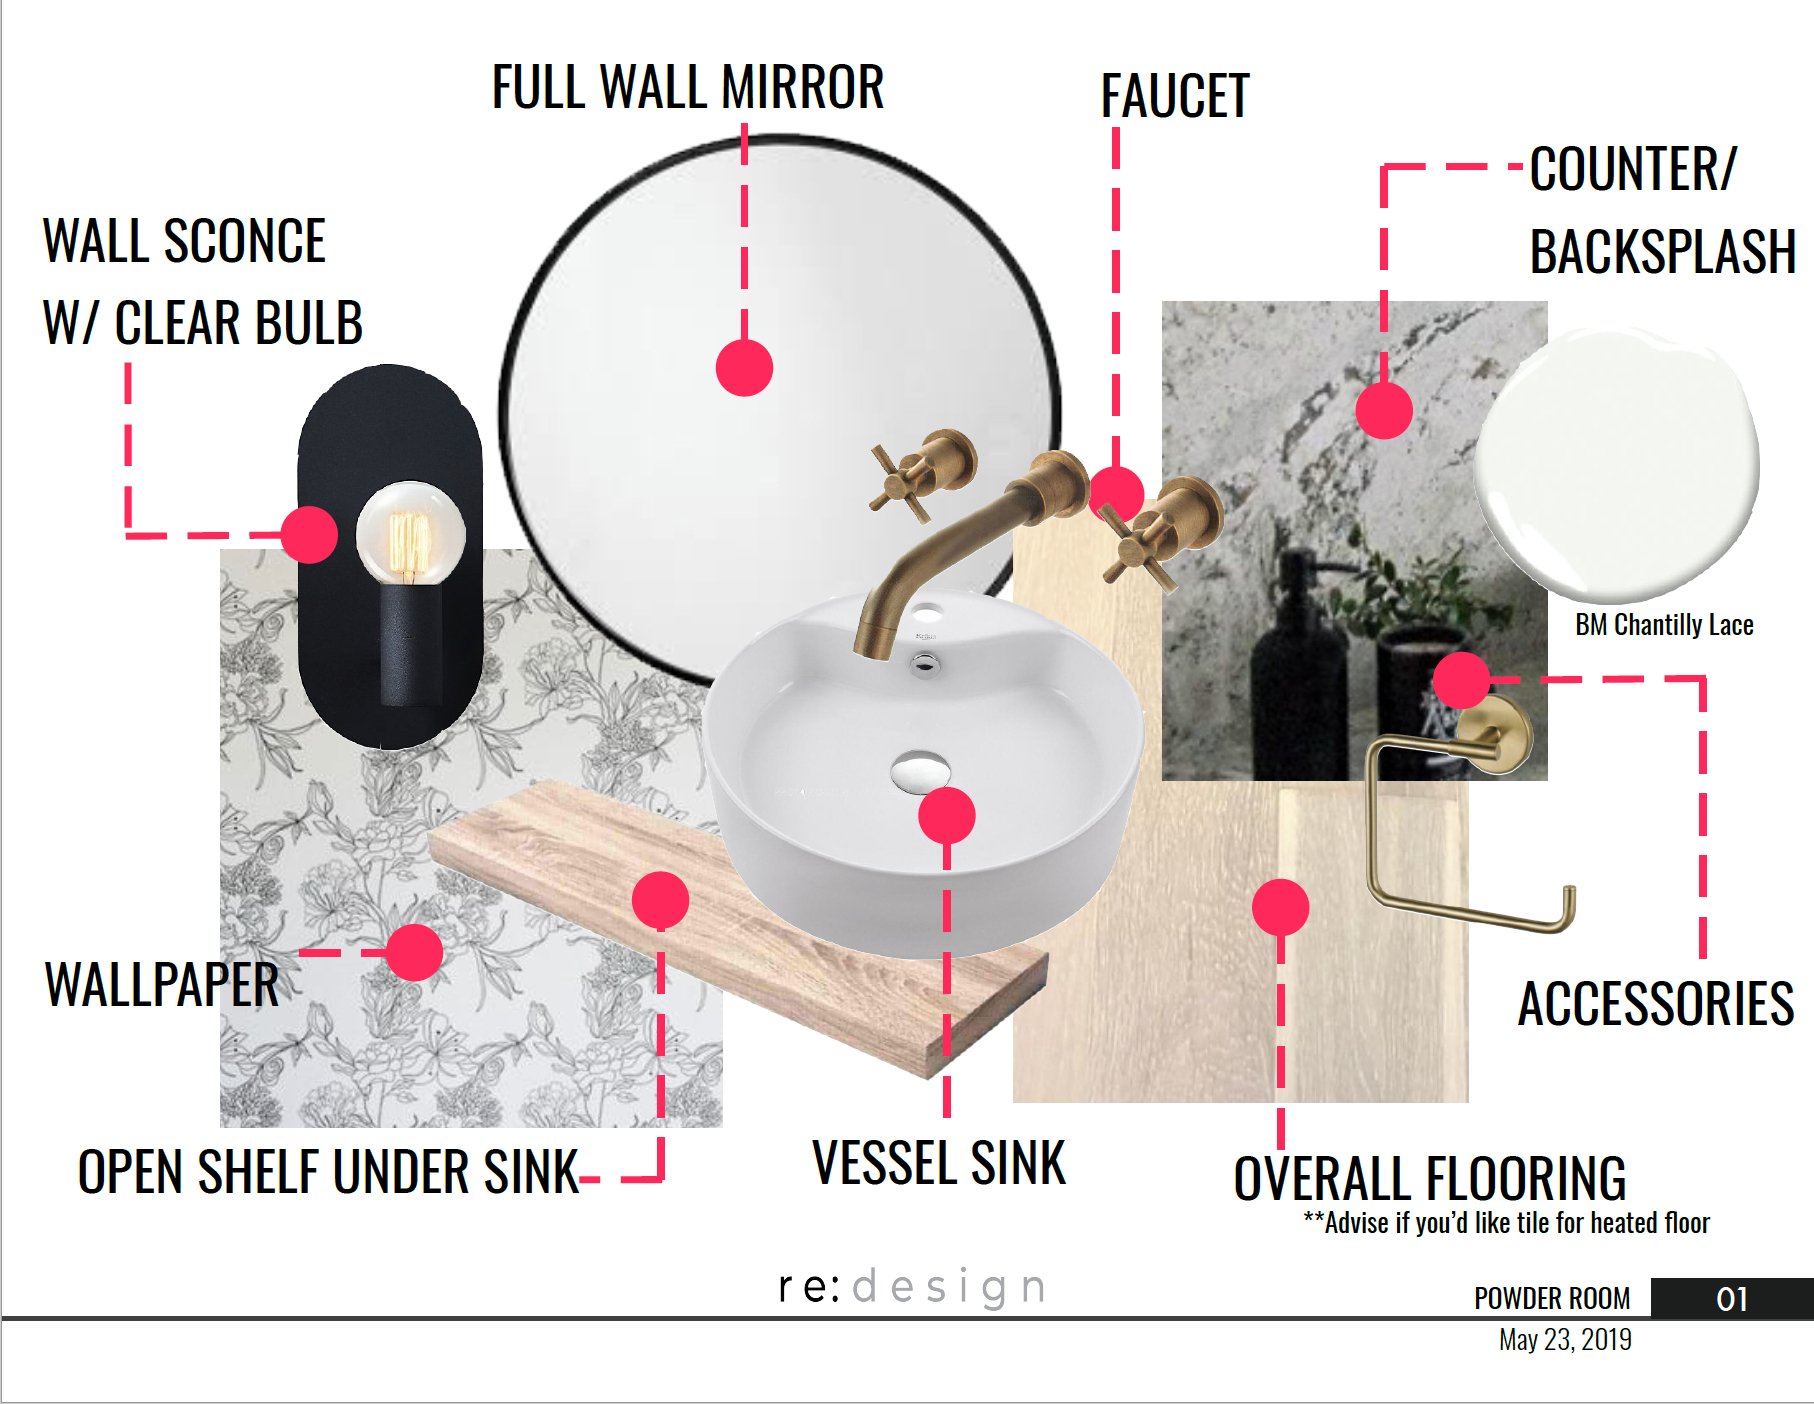
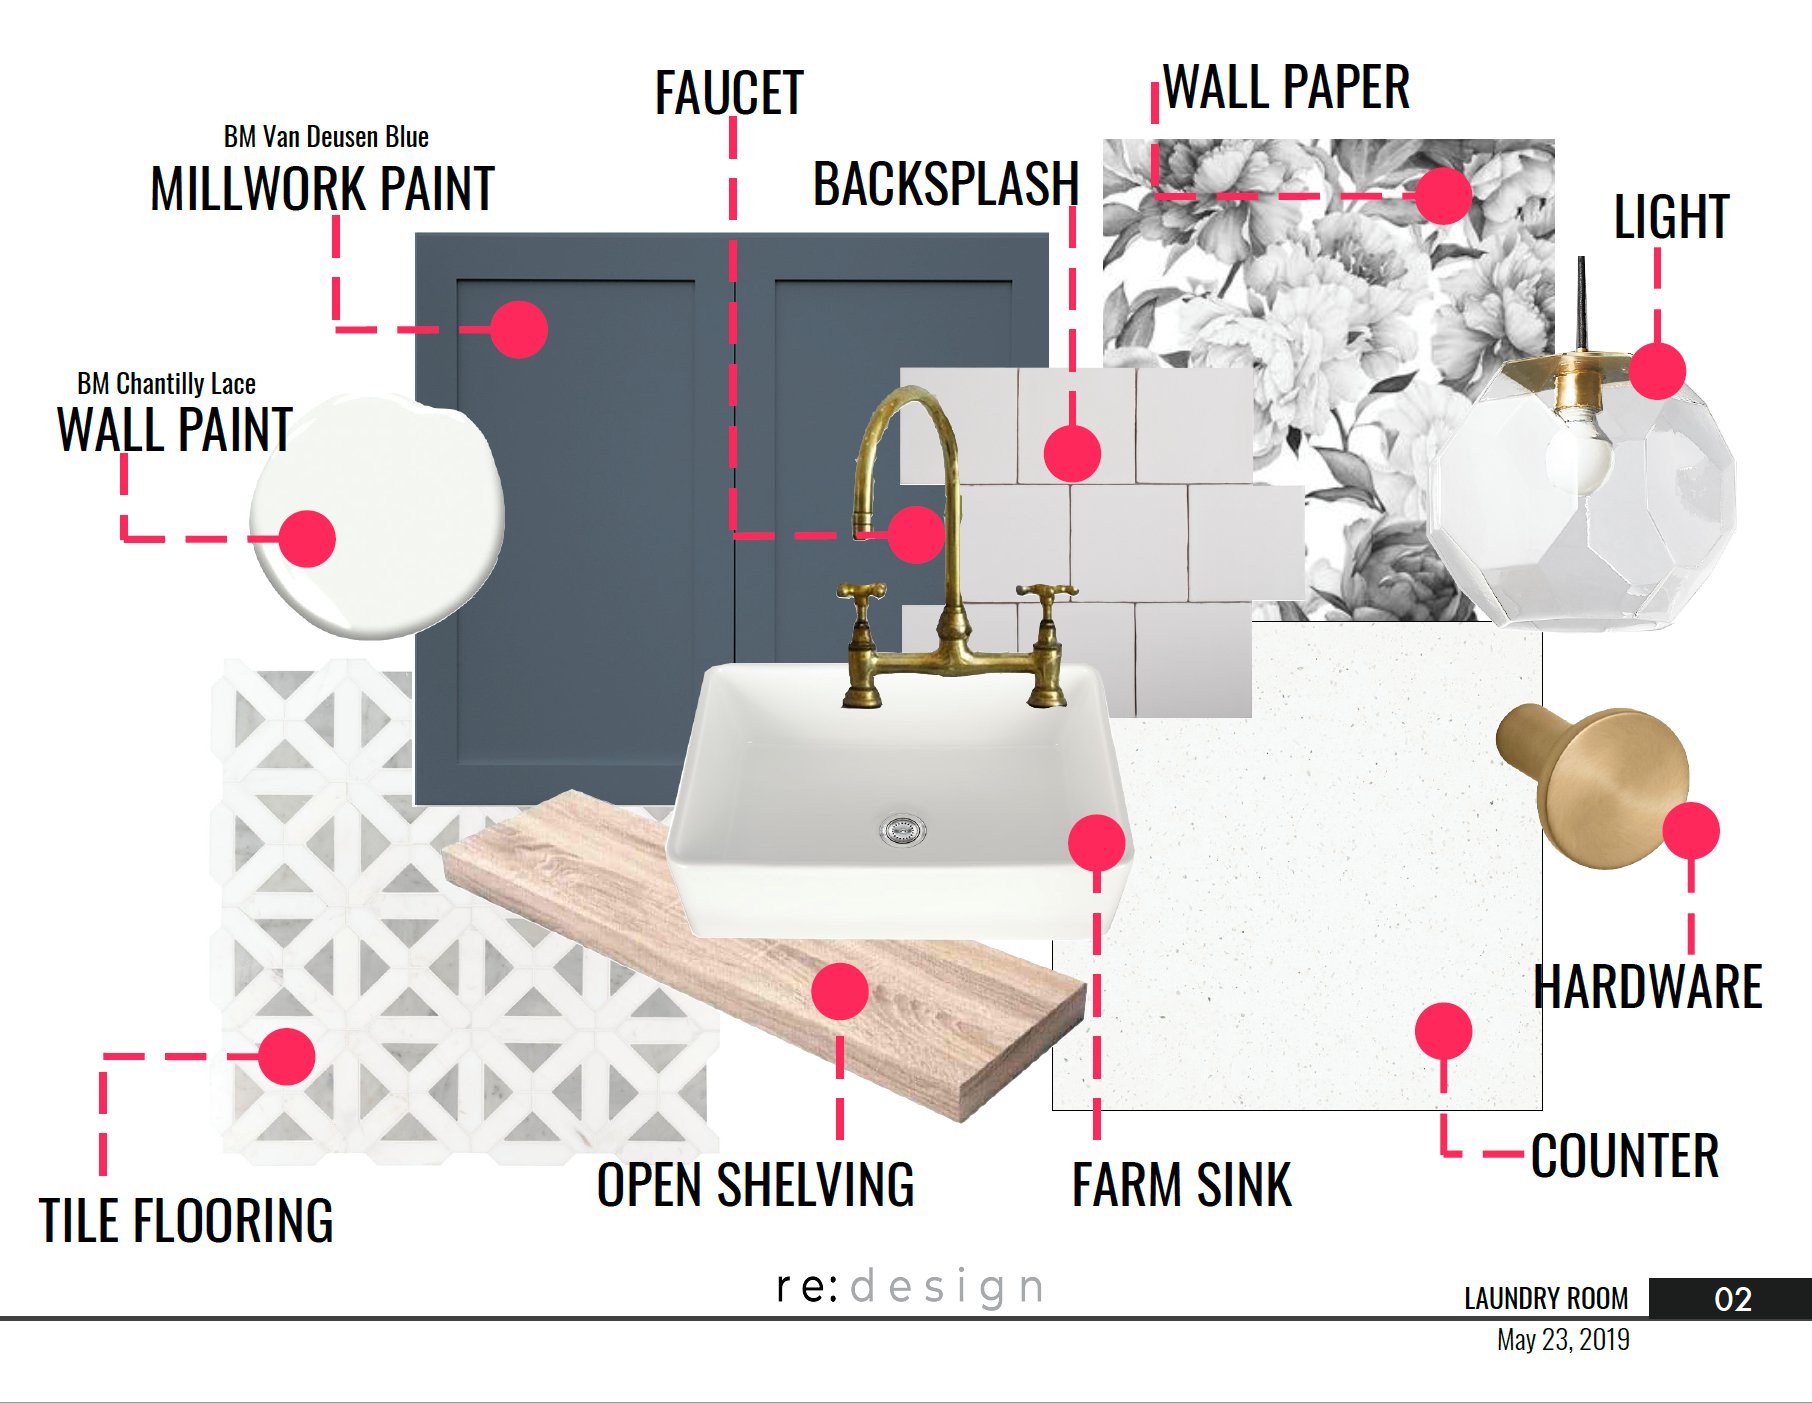
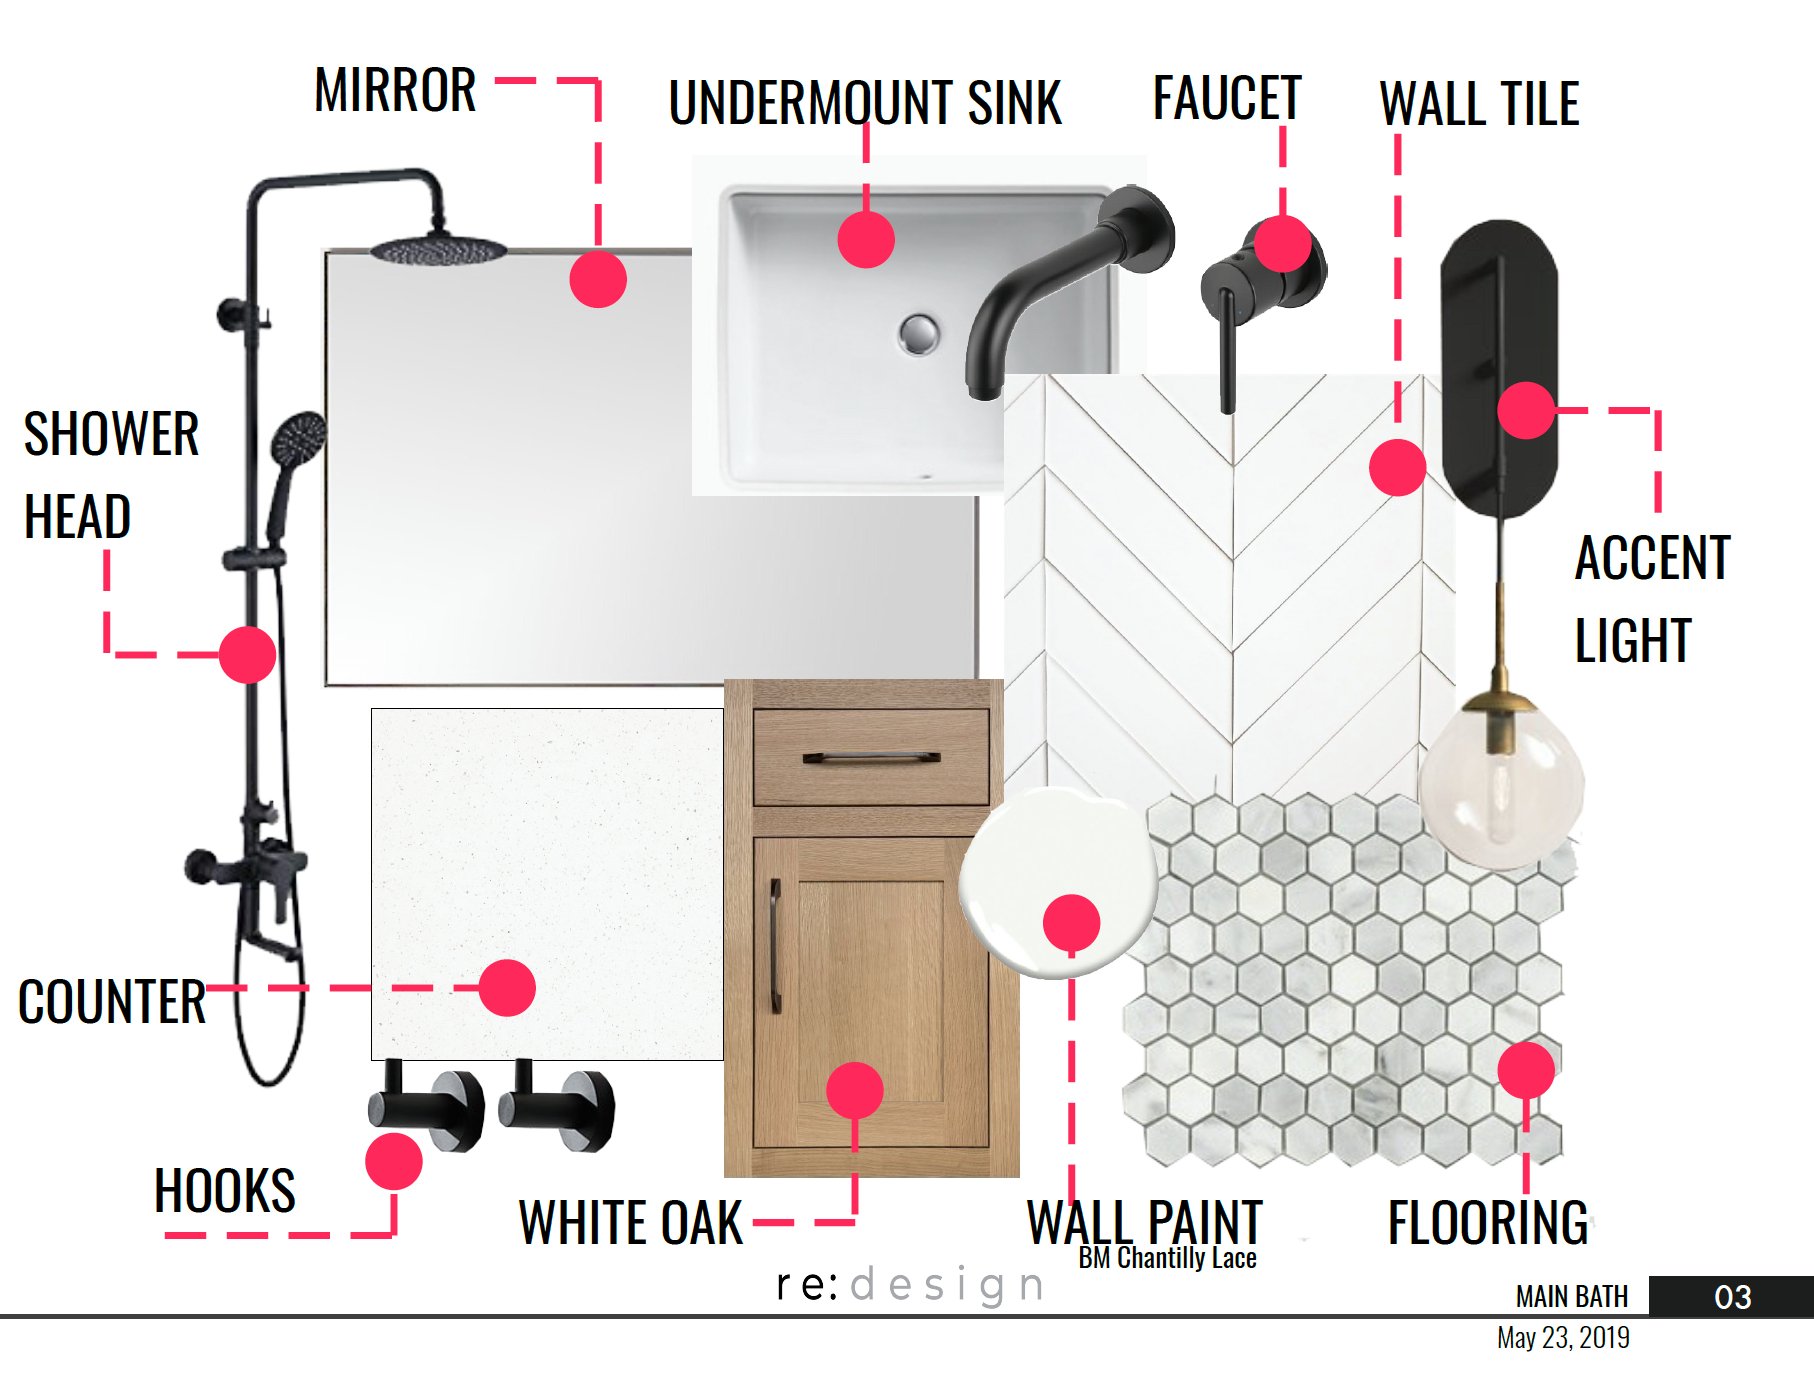
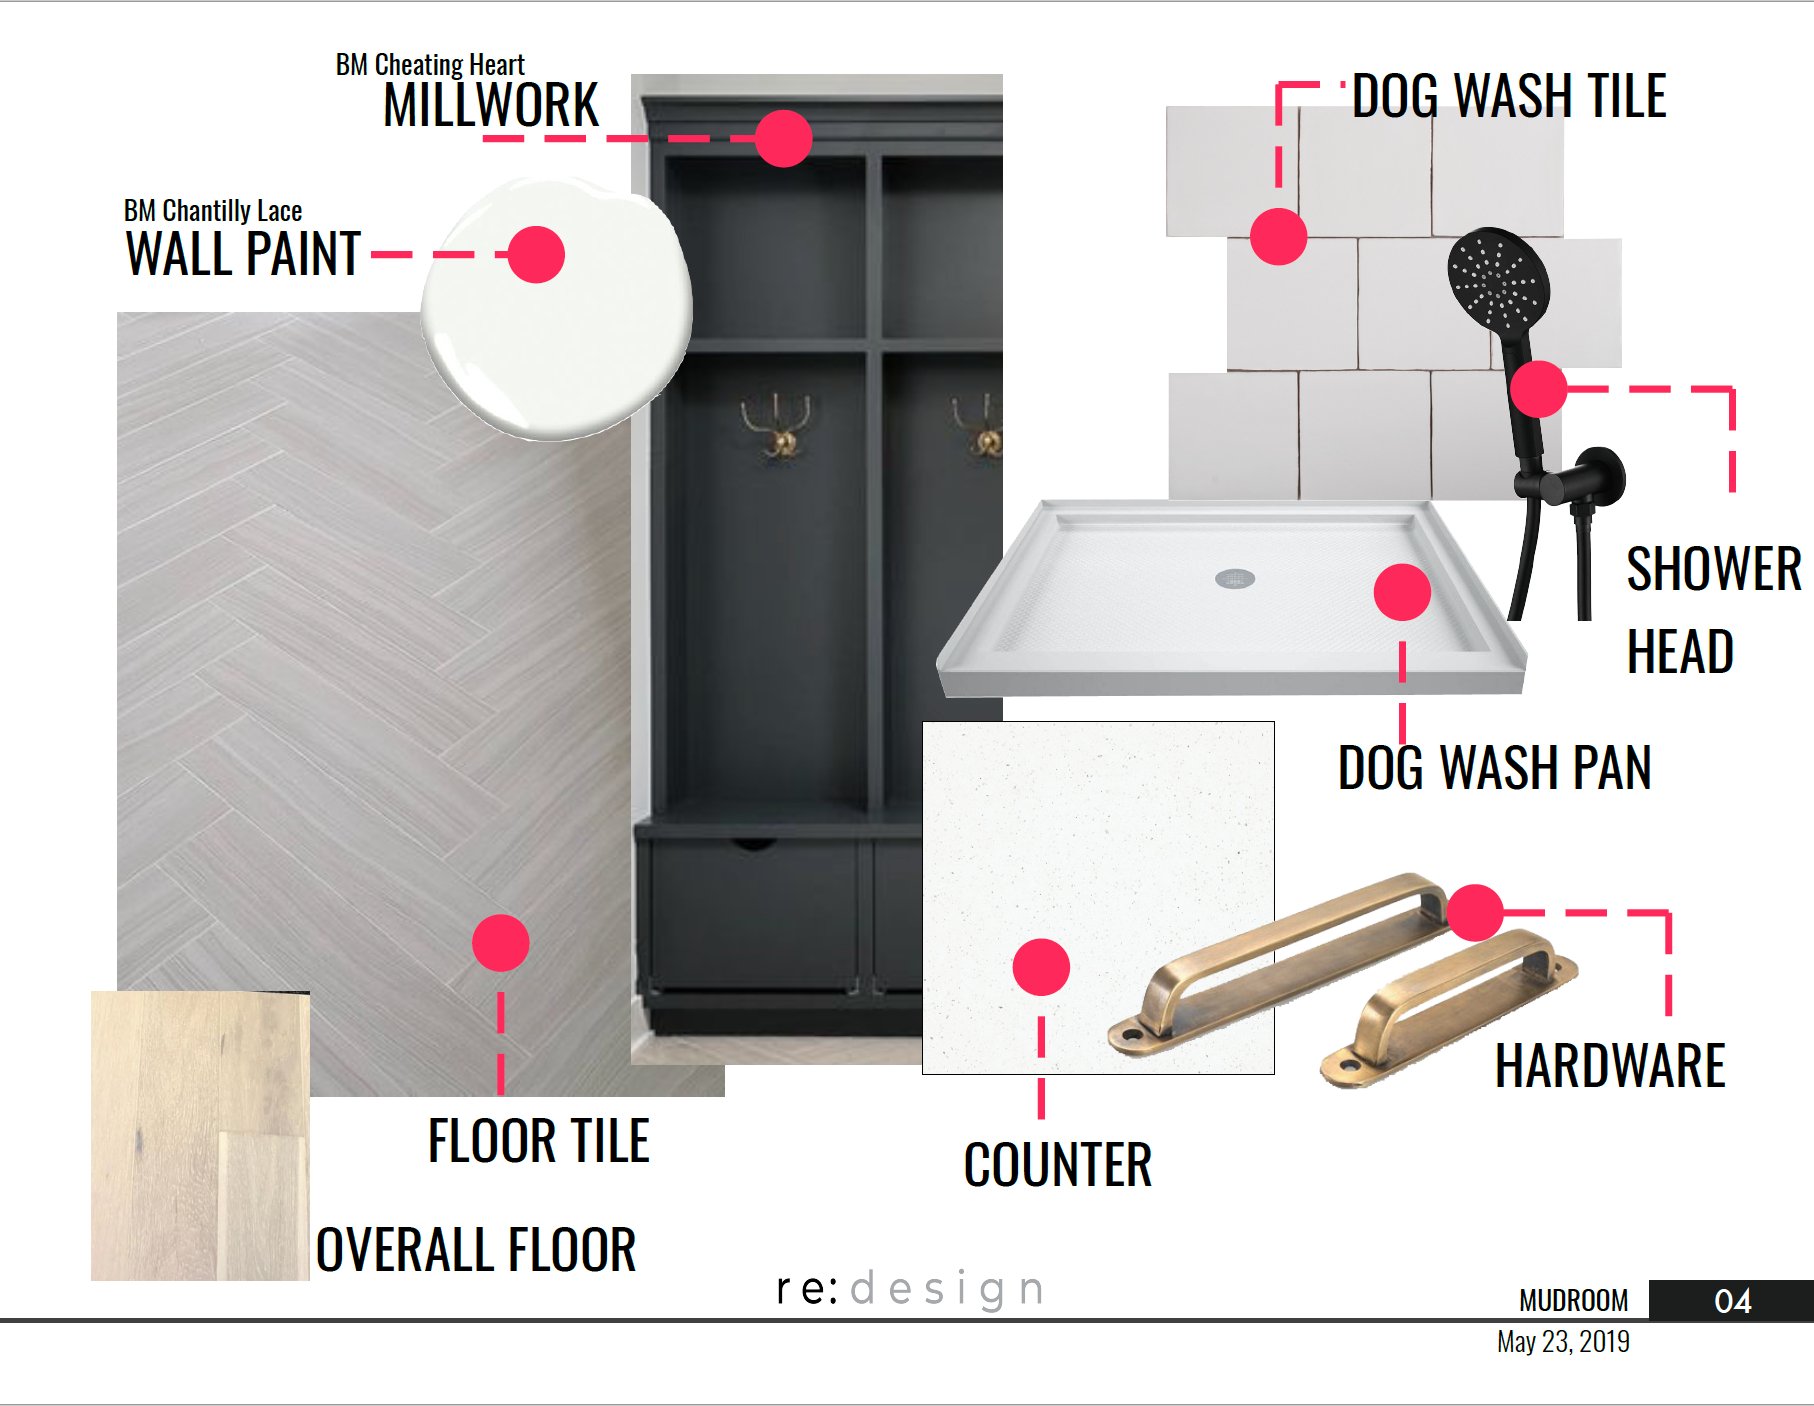
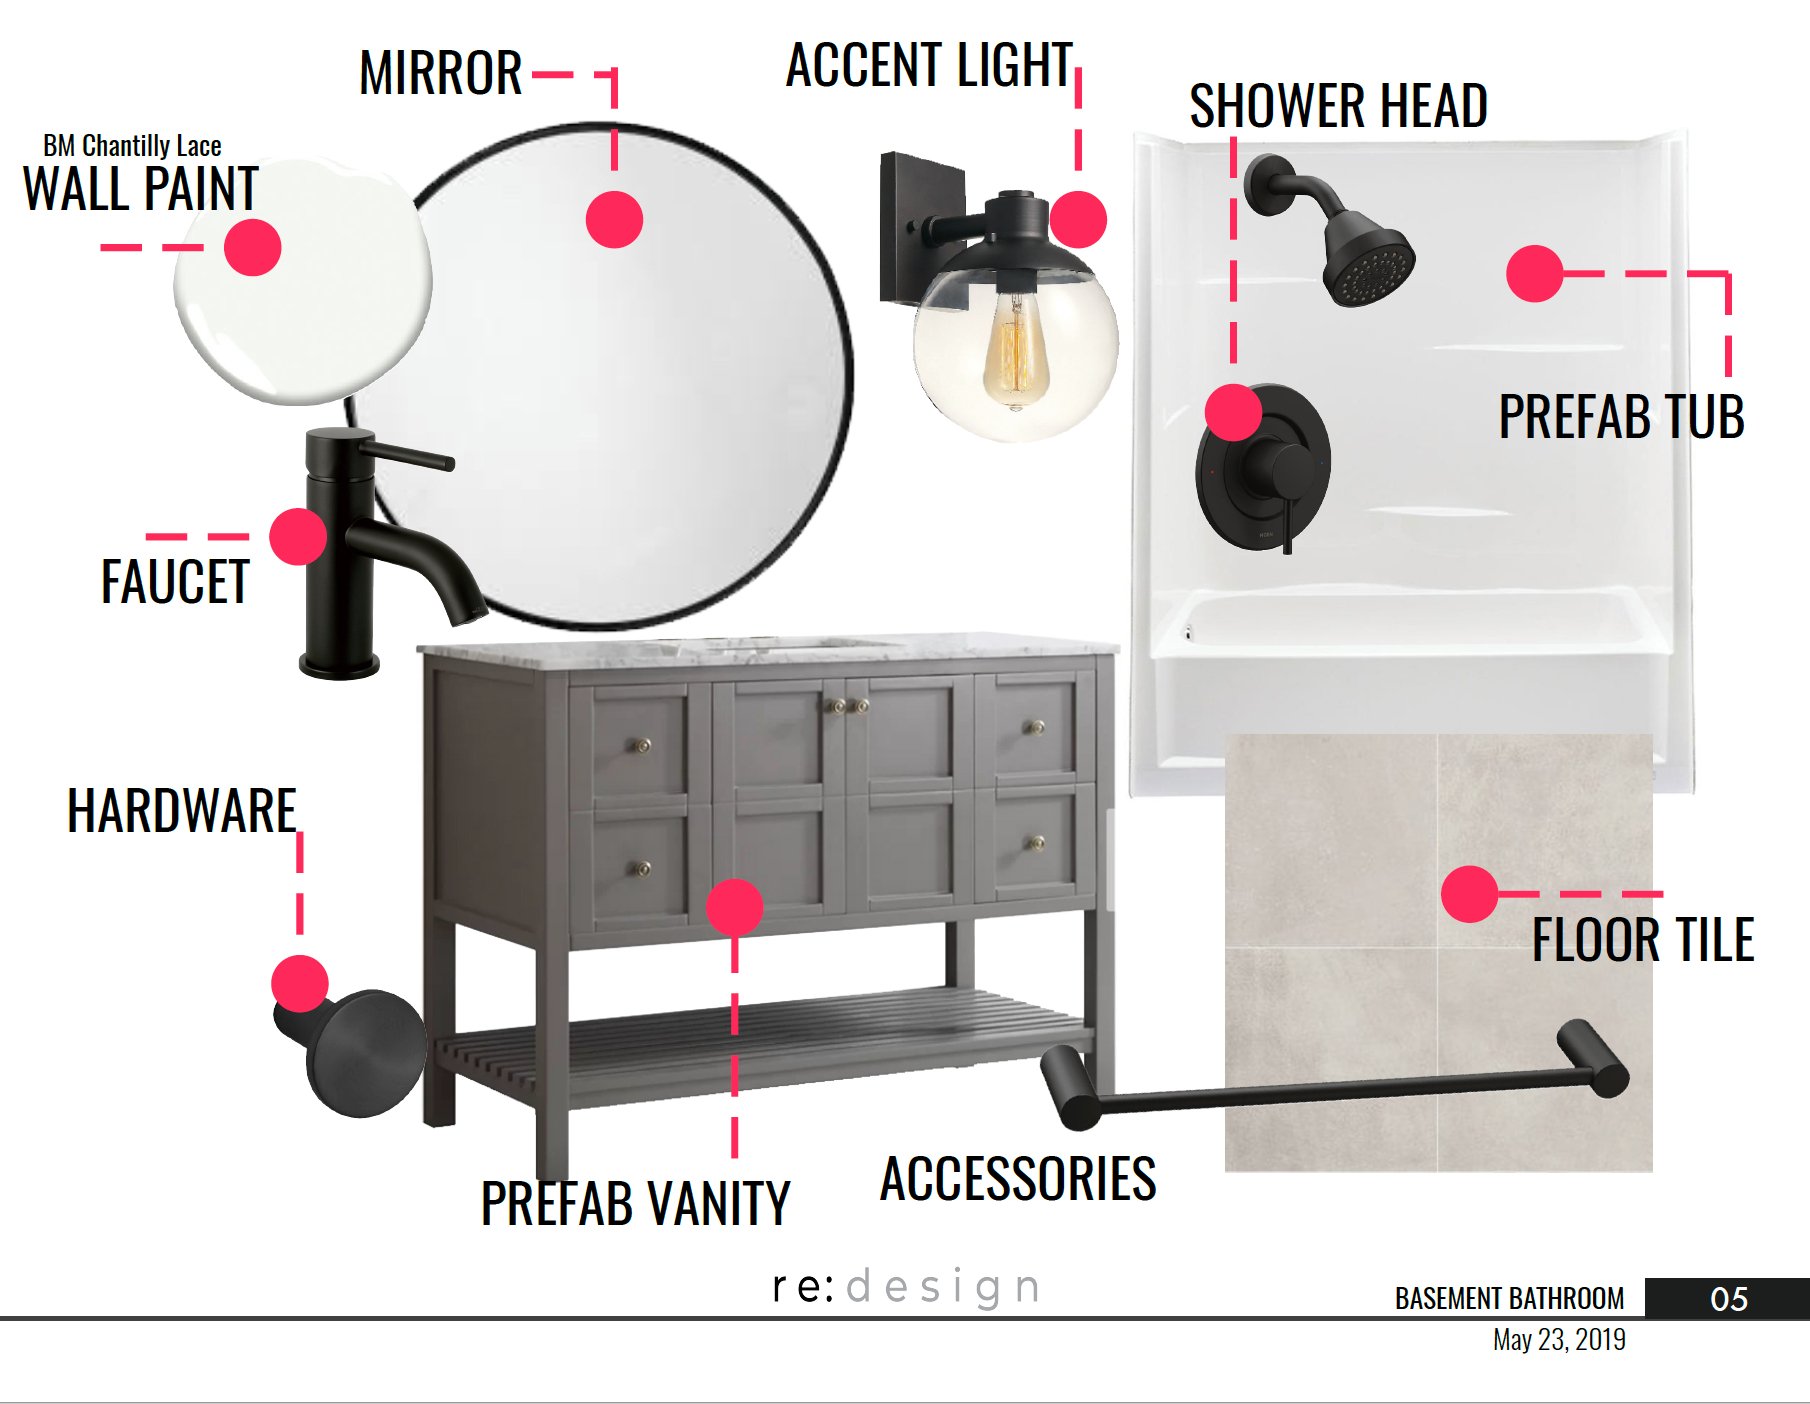
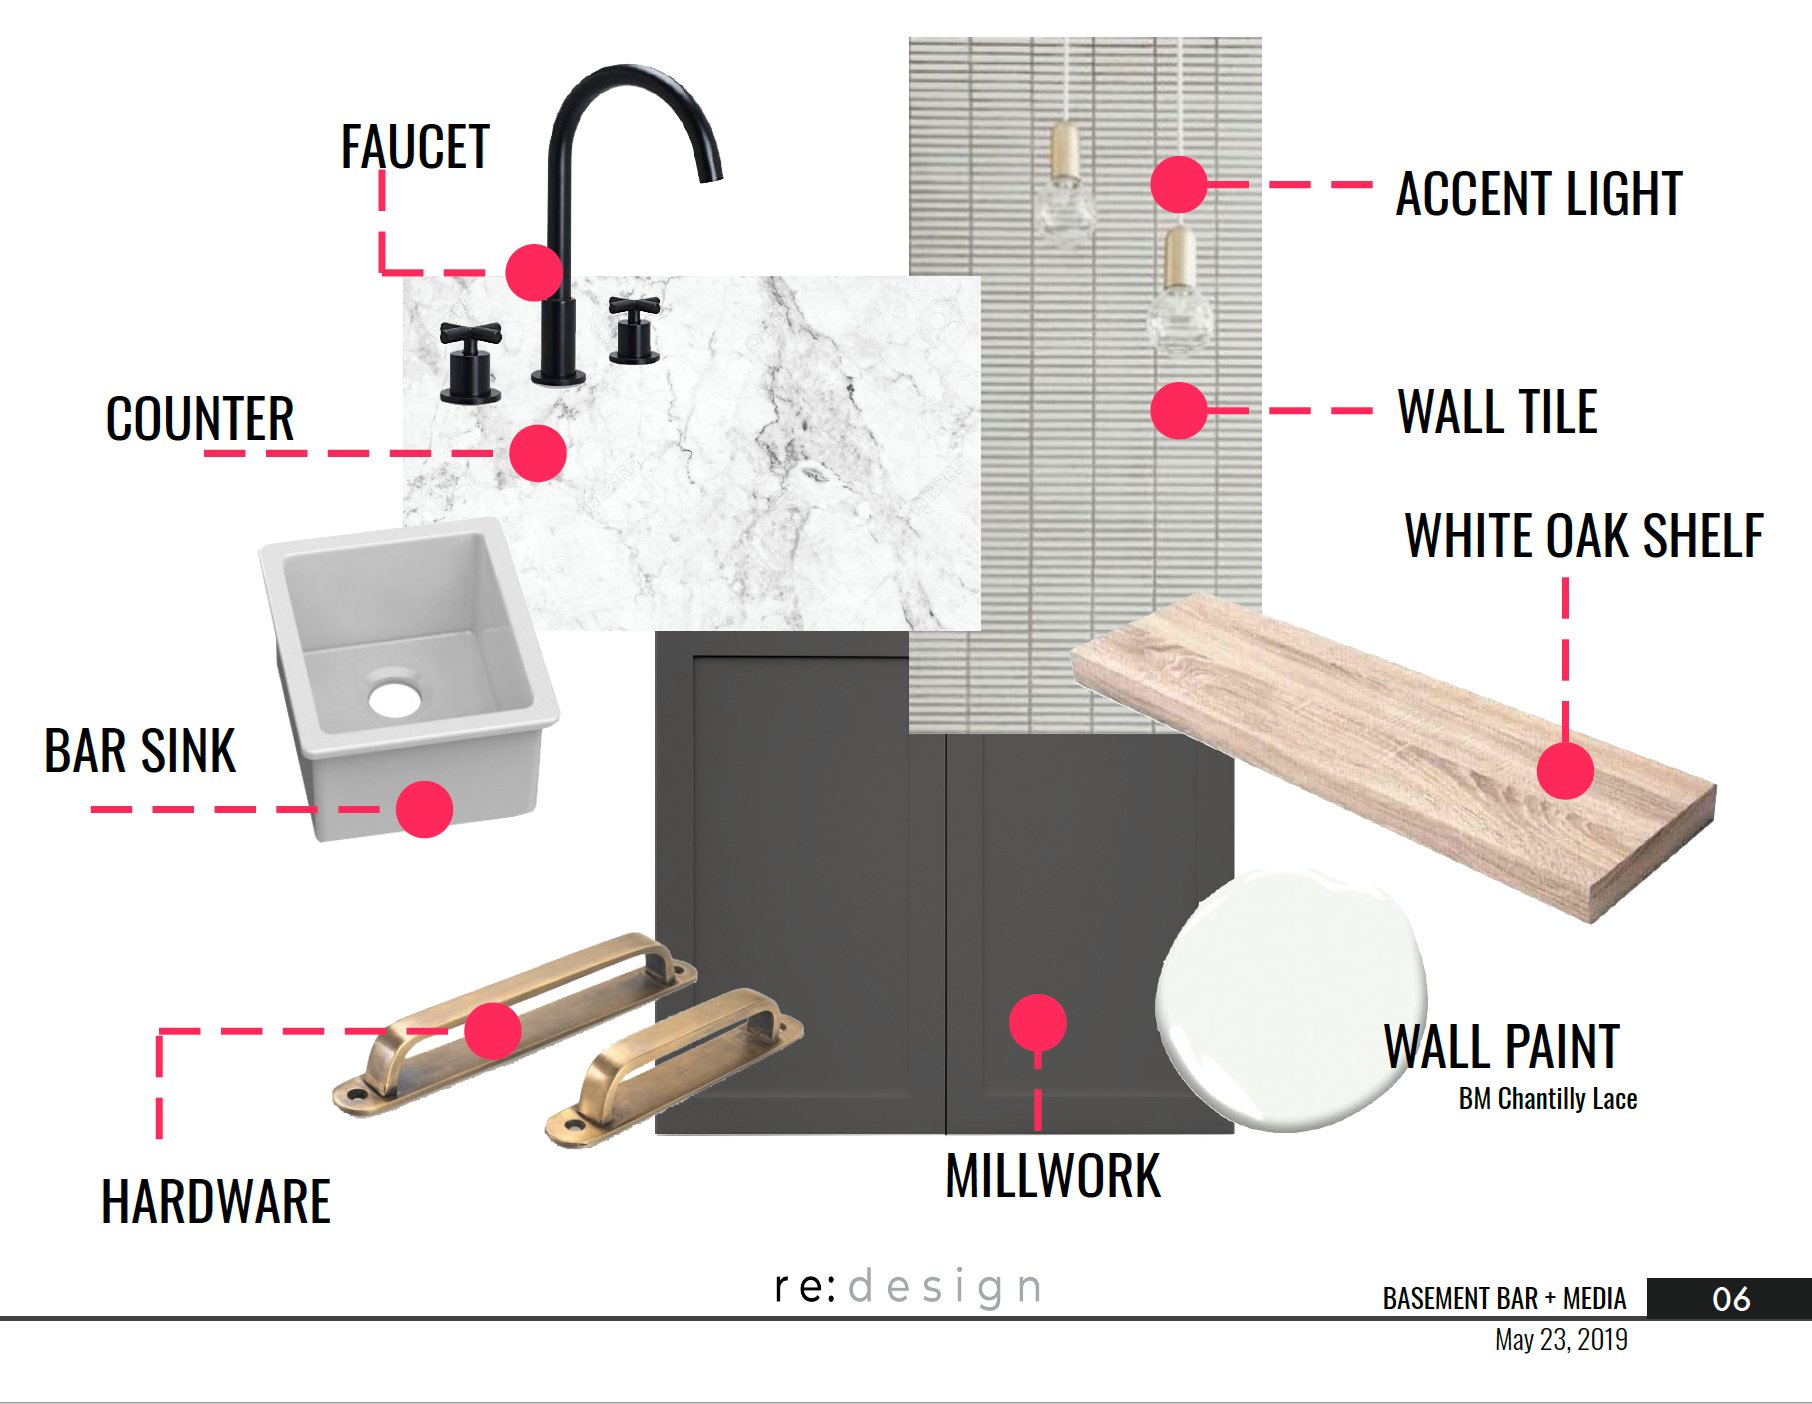
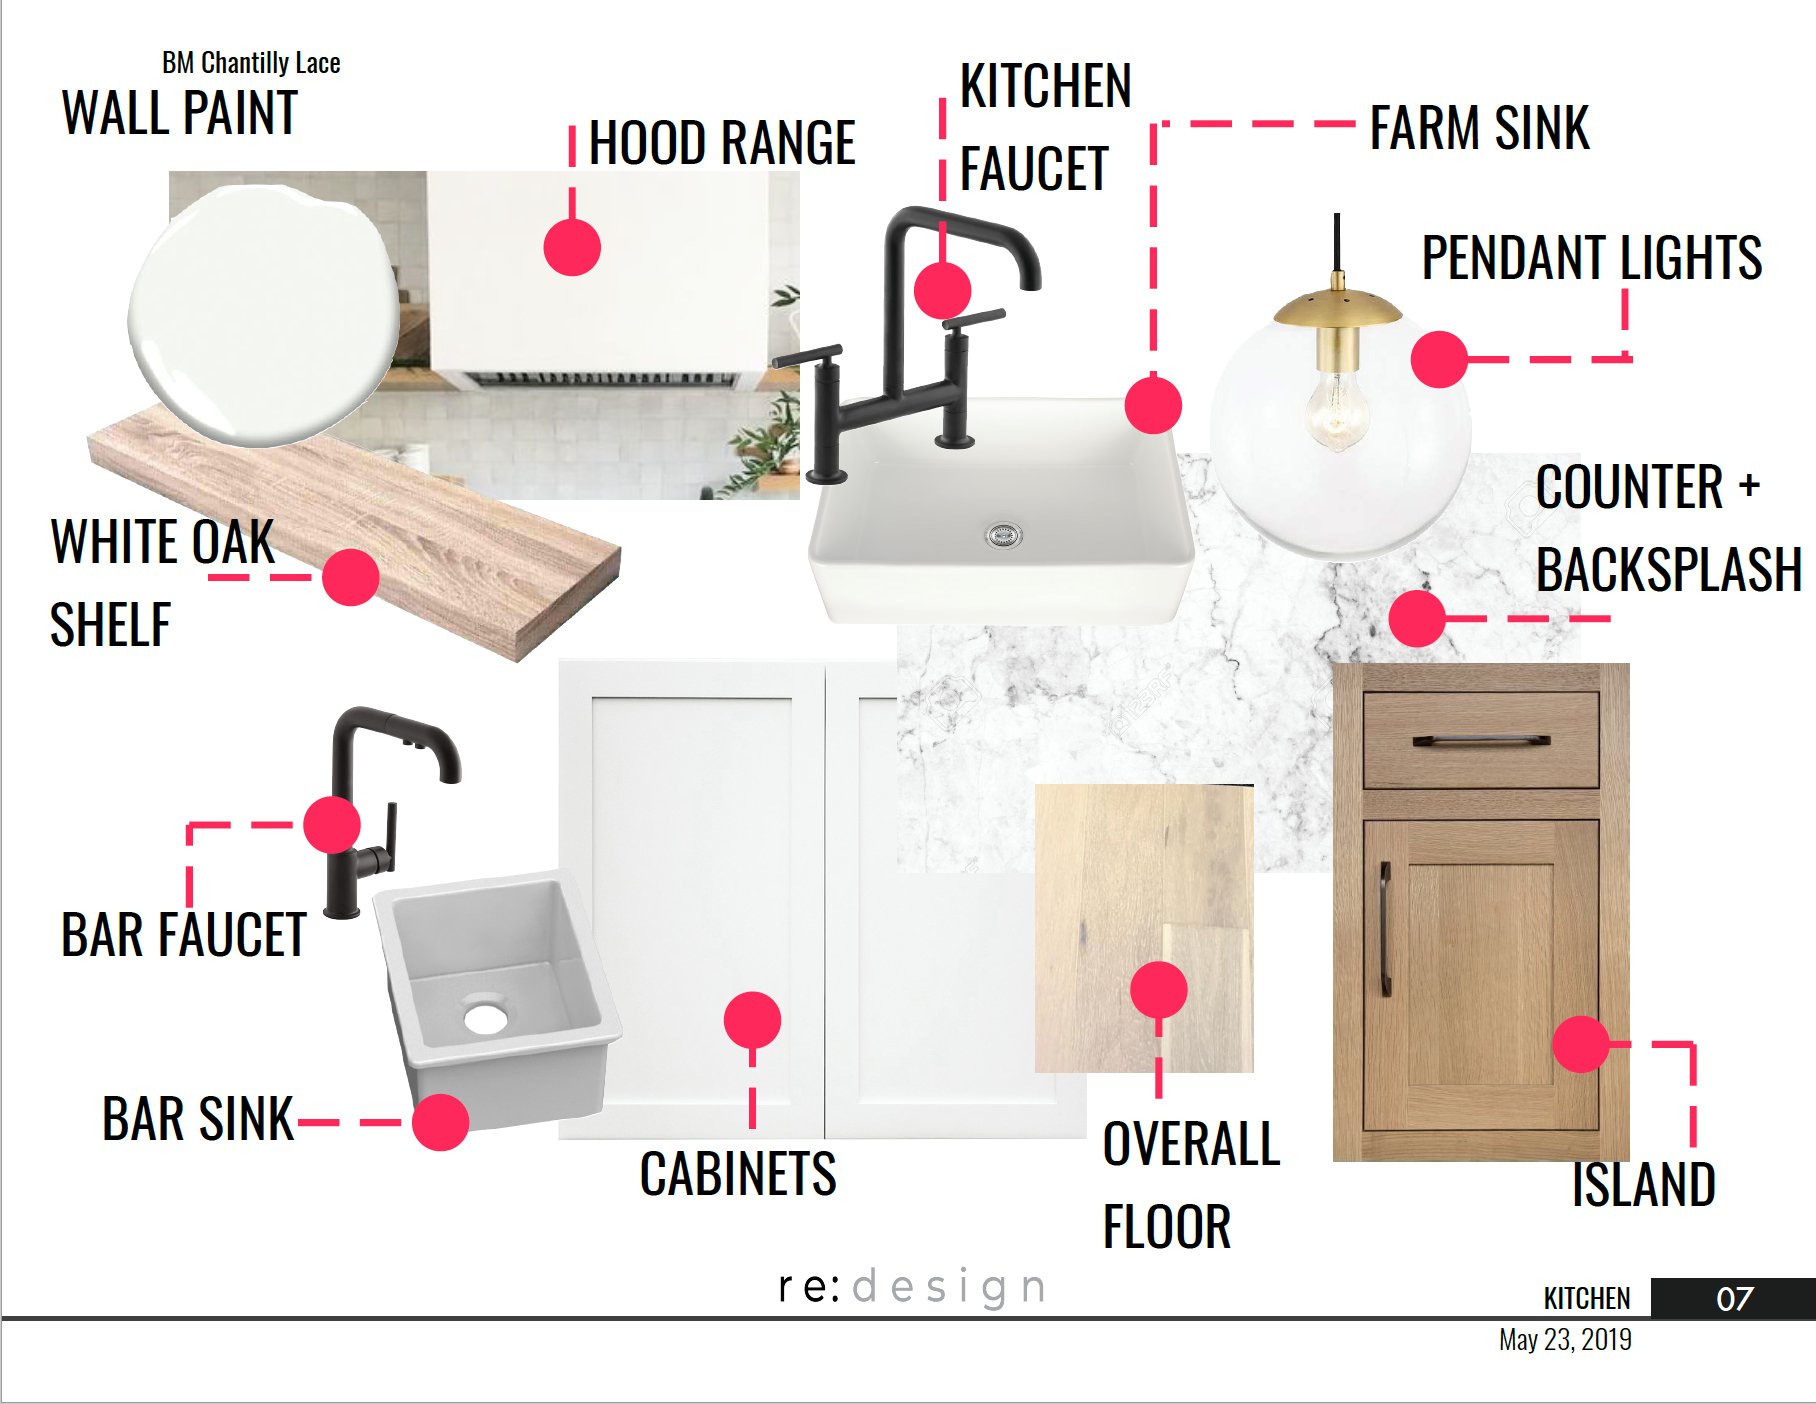
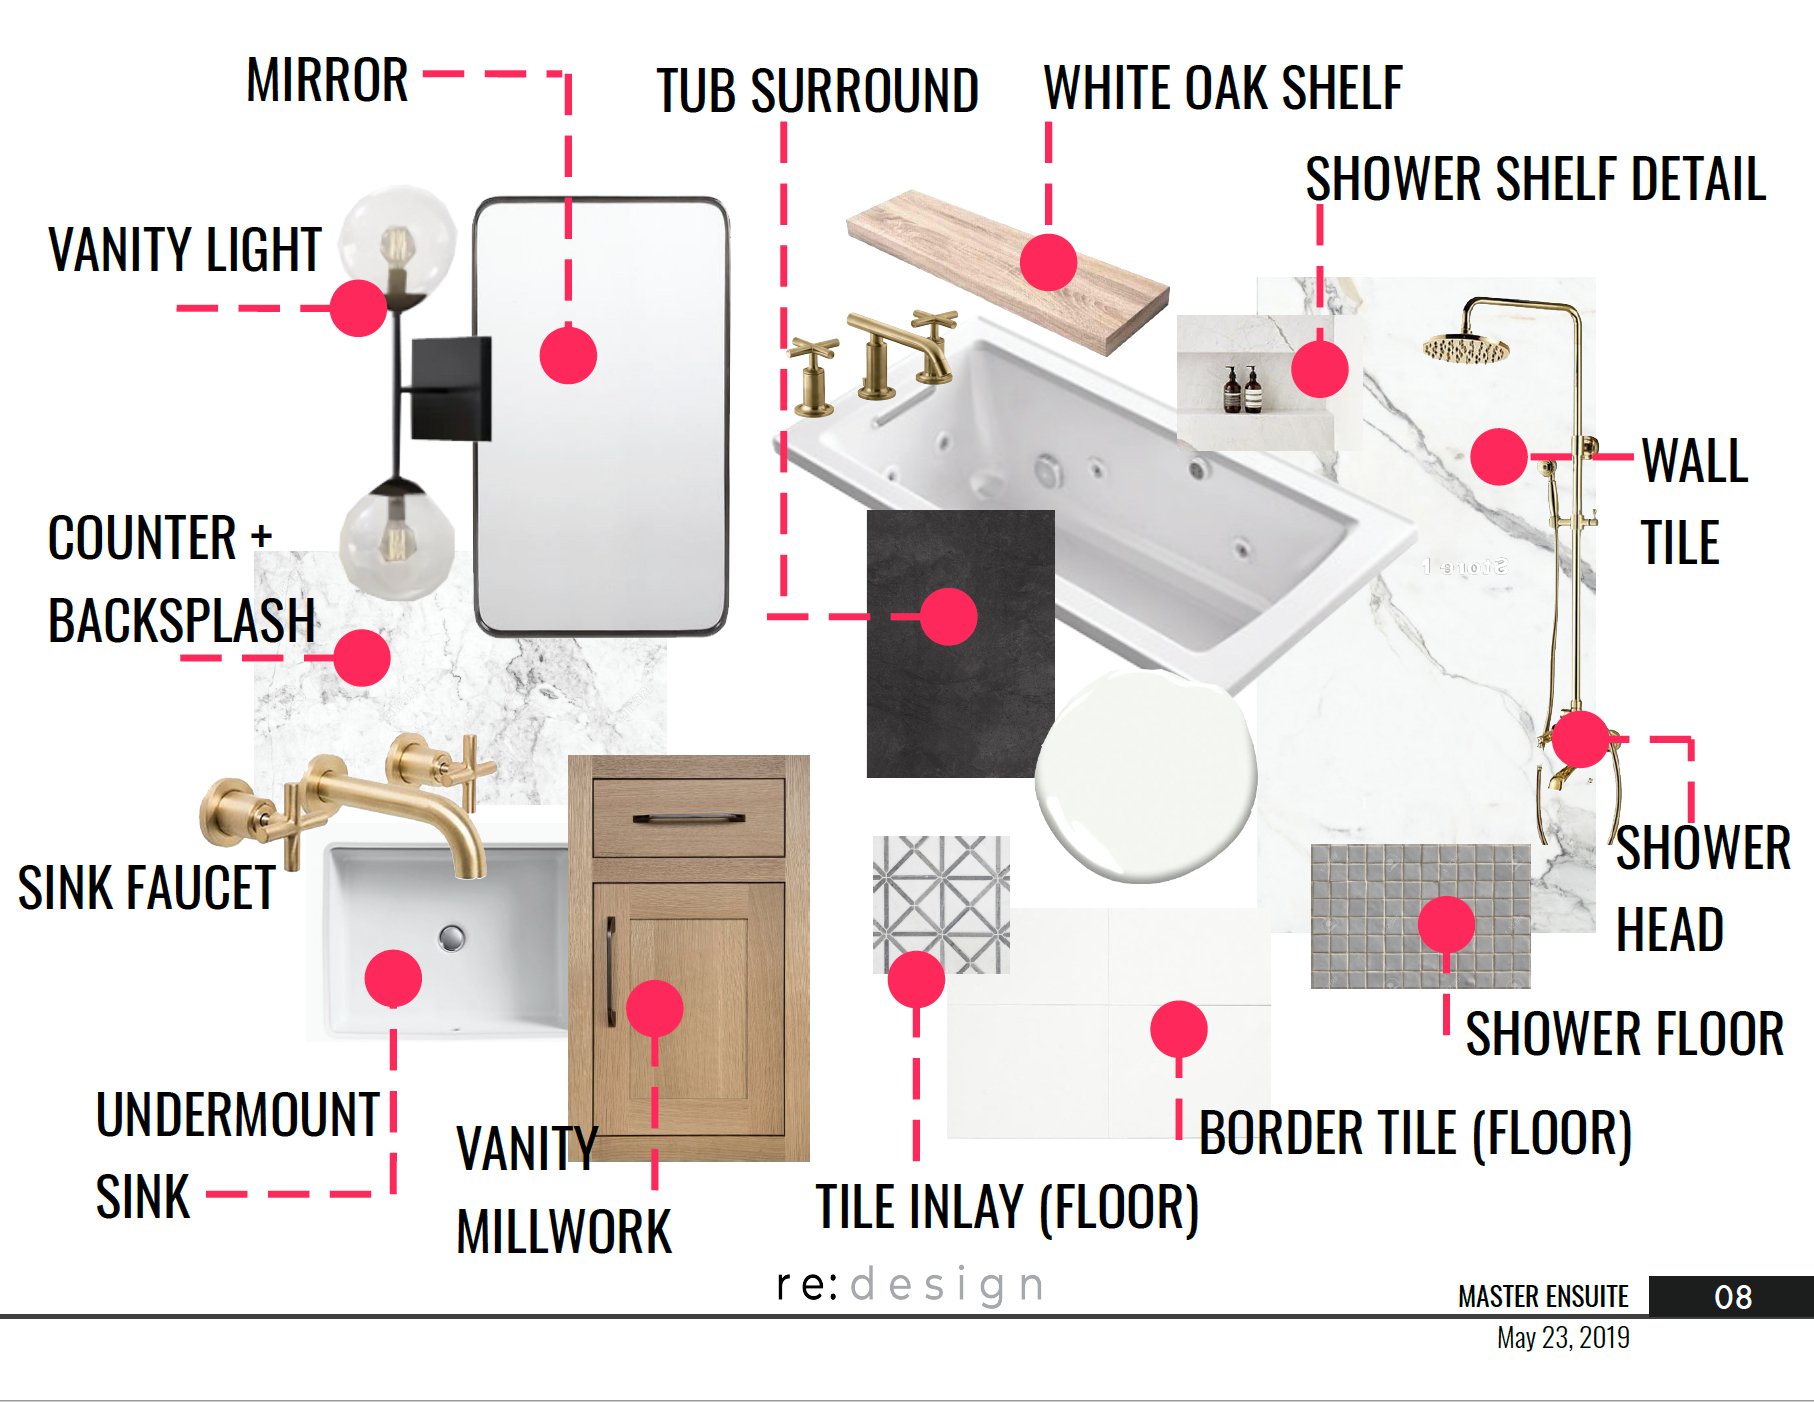
You’ve seen the interior concepts already, so here is a sampling of the curated interior package we provided:
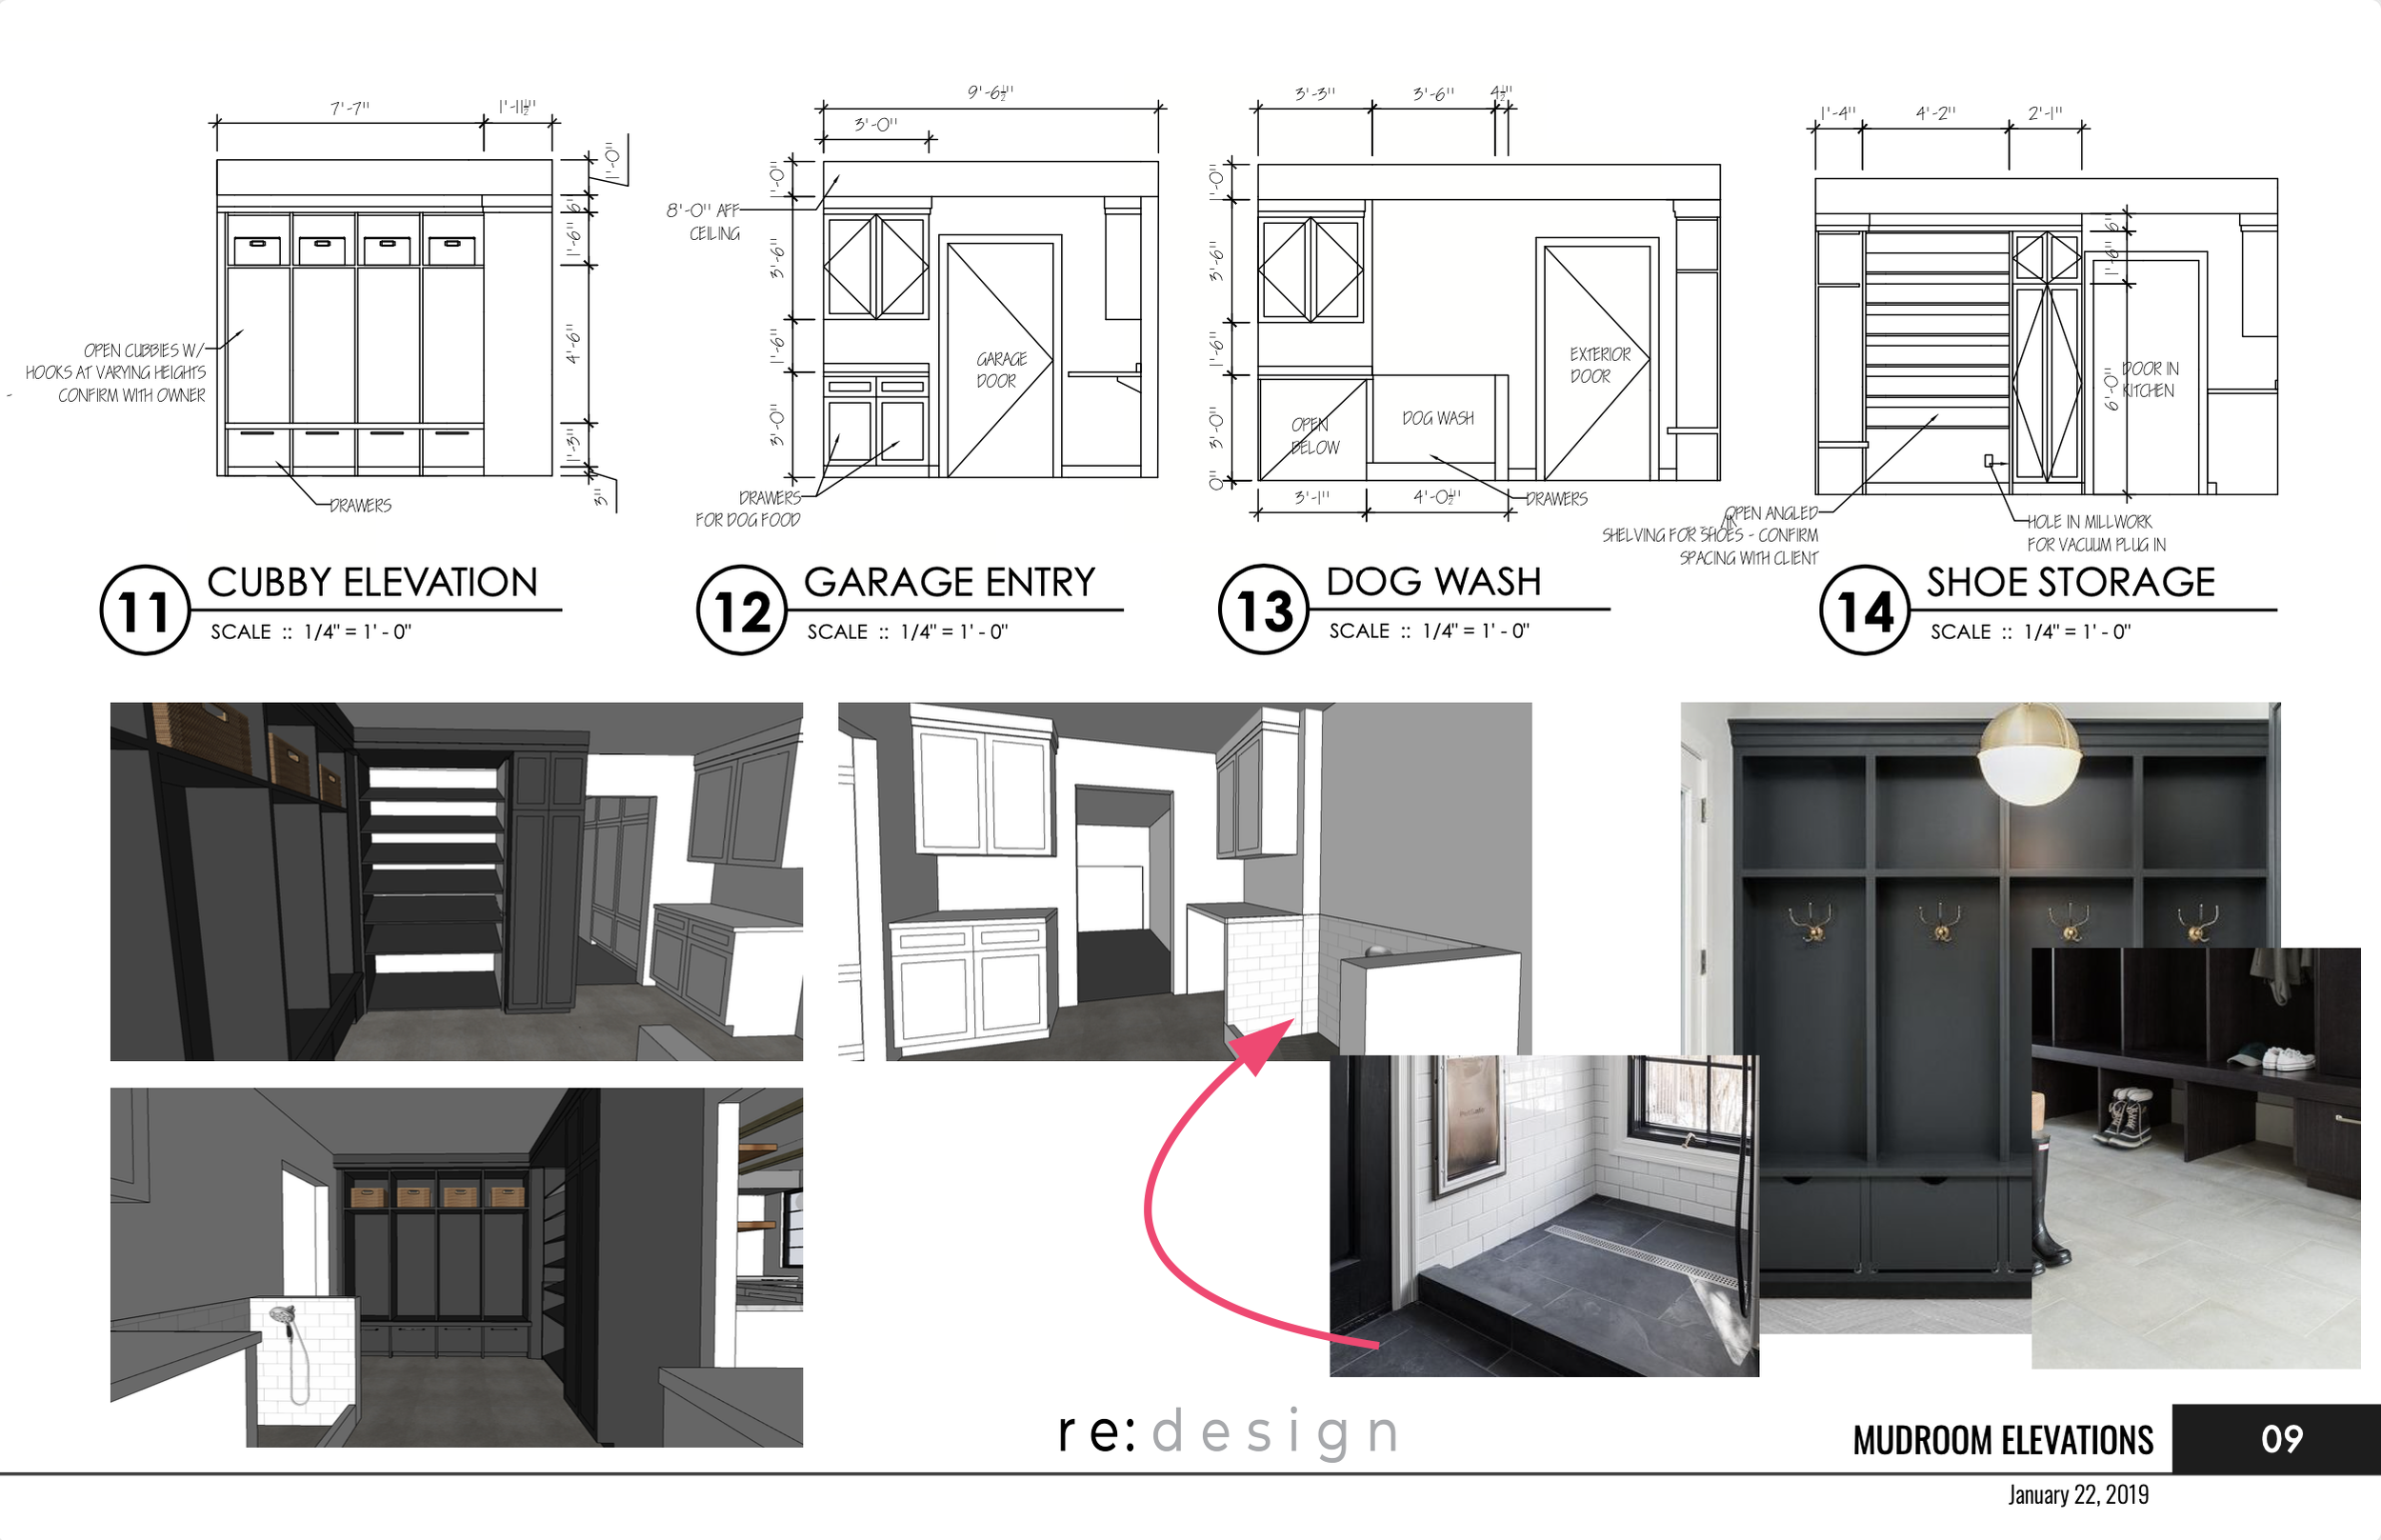
We also provided some conceptual millwork elevations and renders to help guide the clients in their execution of the project. The millworker then provides shop drawings based on these and any site conditions.


For this build, we were apart of Contract Admin, which really means we were available to work with the contractor and clients during construction. It was very helpful in the process to help the client make some final decisions! The collaborative process can be a great one if the communication is strong and you’ve put a team together that works cohesively!
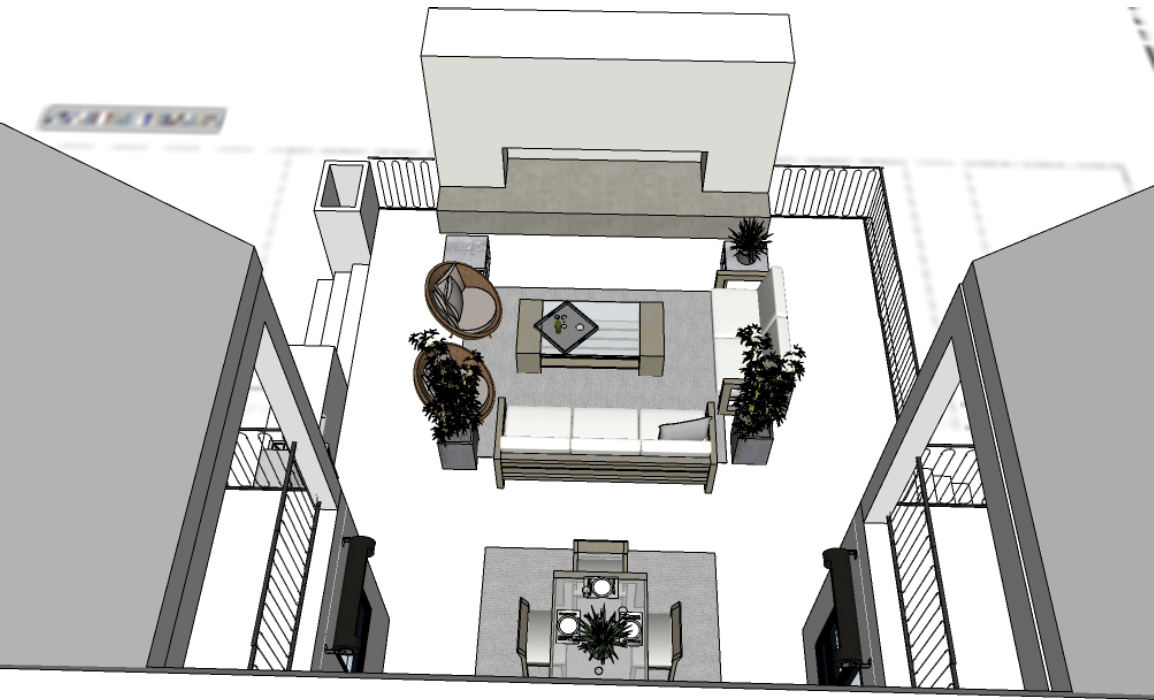
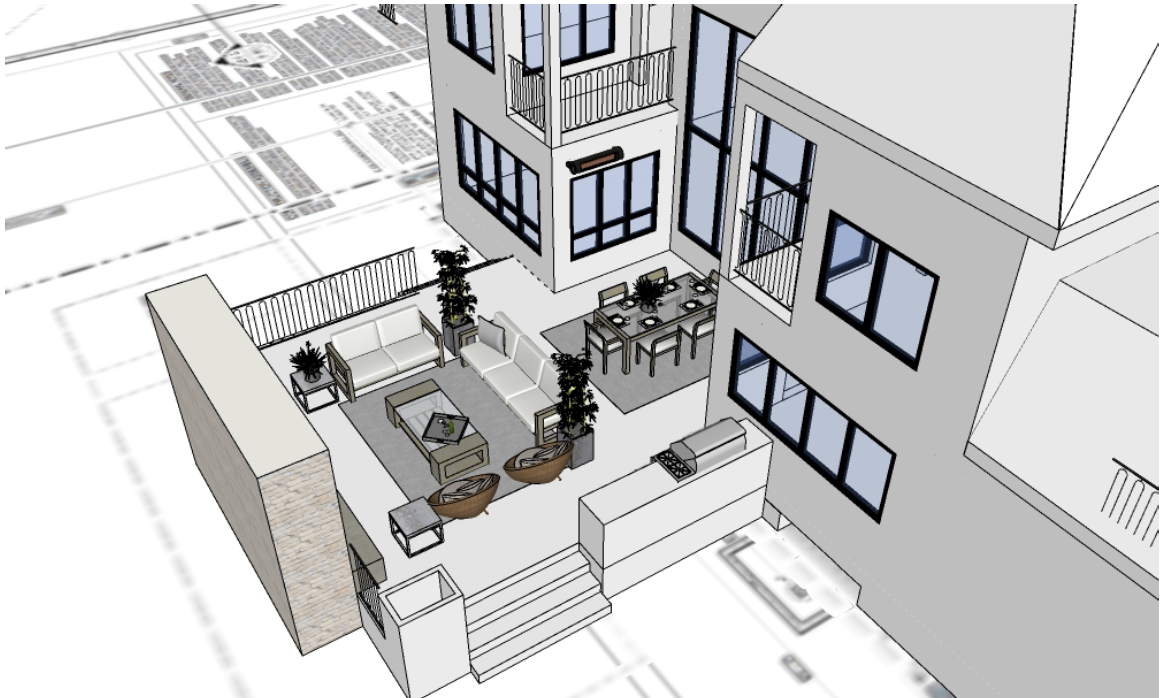
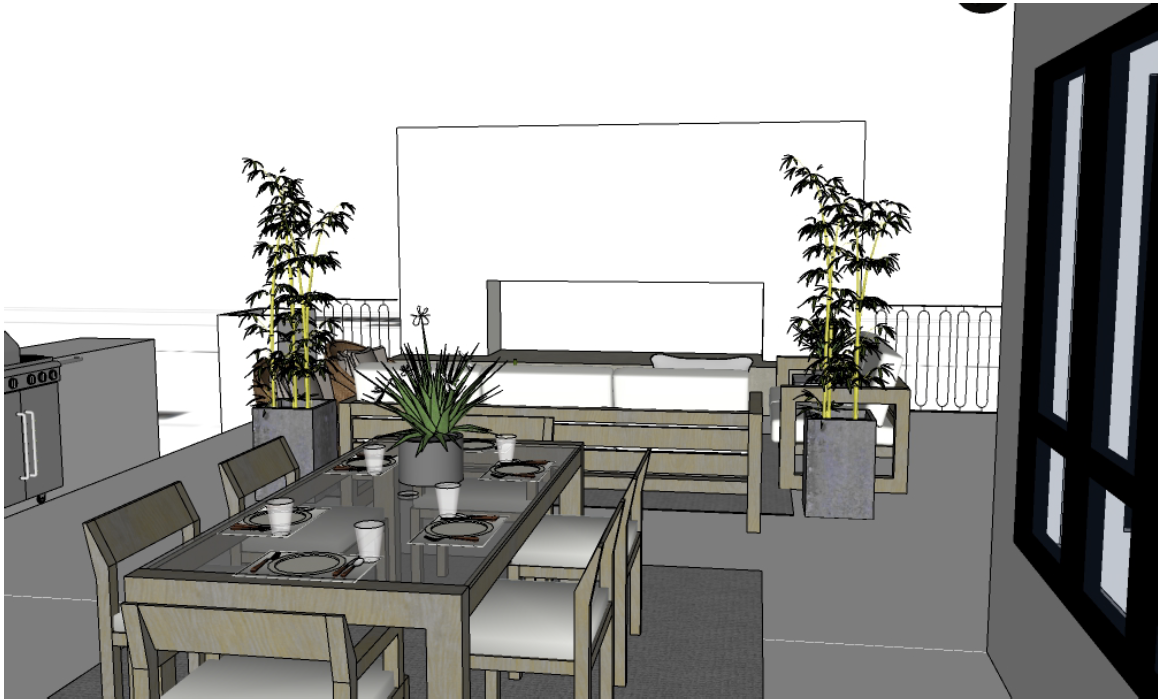
The last bit of design left was to develop the landscape for the backyard courtyard! Maximizing on the view created by the dining room curtain wall, it was important to create a space worth looking at!

If you’re curious to see the final home, go check out our portfolio page! In the meantime, check out the links below if you love this design and want to shop the look for yourself!
SHOP THE LOOK!